|
|
Post by carguy4471 on Apr 16, 2012 22:46:50 GMT -4
The postman arrived today with some fantastic goodies!! 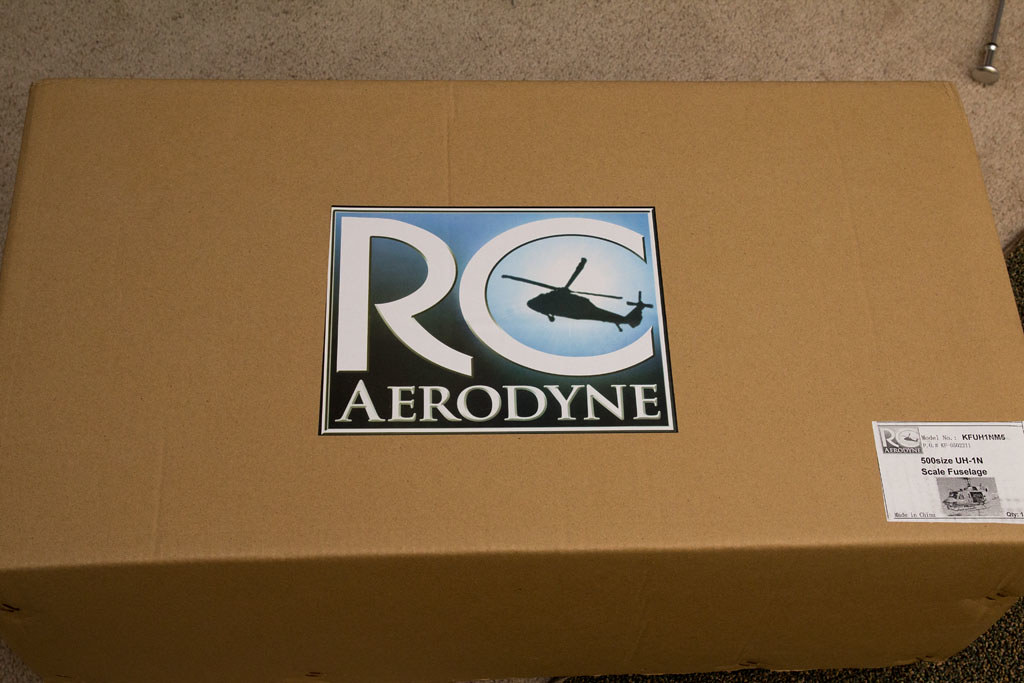 IMG_1406_01 IMG_1406_01 by carguy4471, on Flickr  IMG_1407_02 IMG_1407_02 by carguy4471, on Flickr 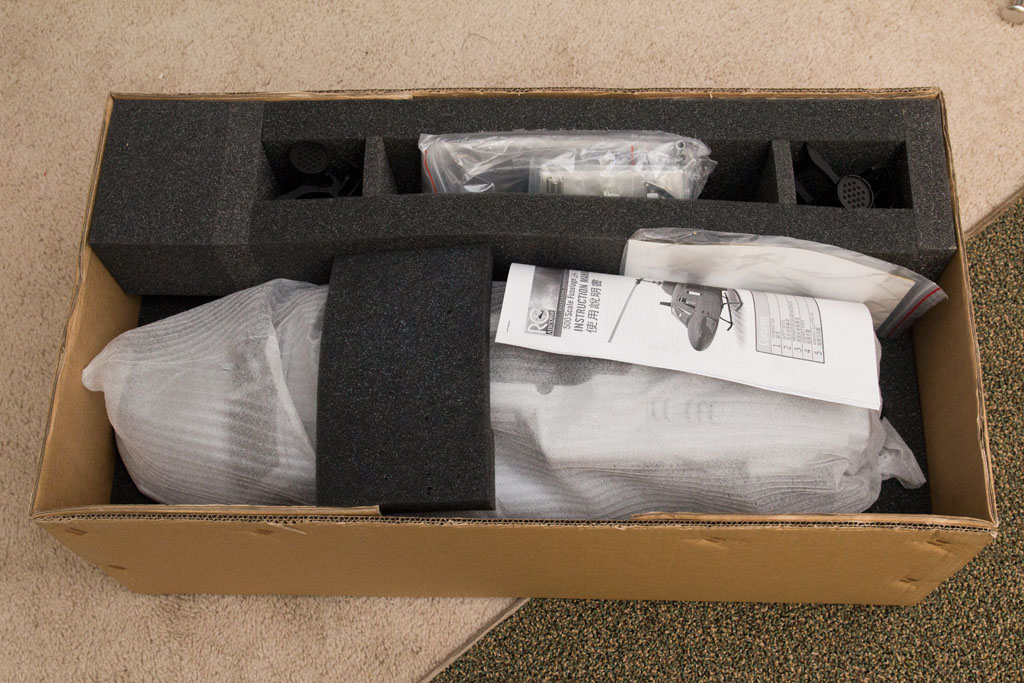 IMG_1408_03 IMG_1408_03 by carguy4471, on Flickr 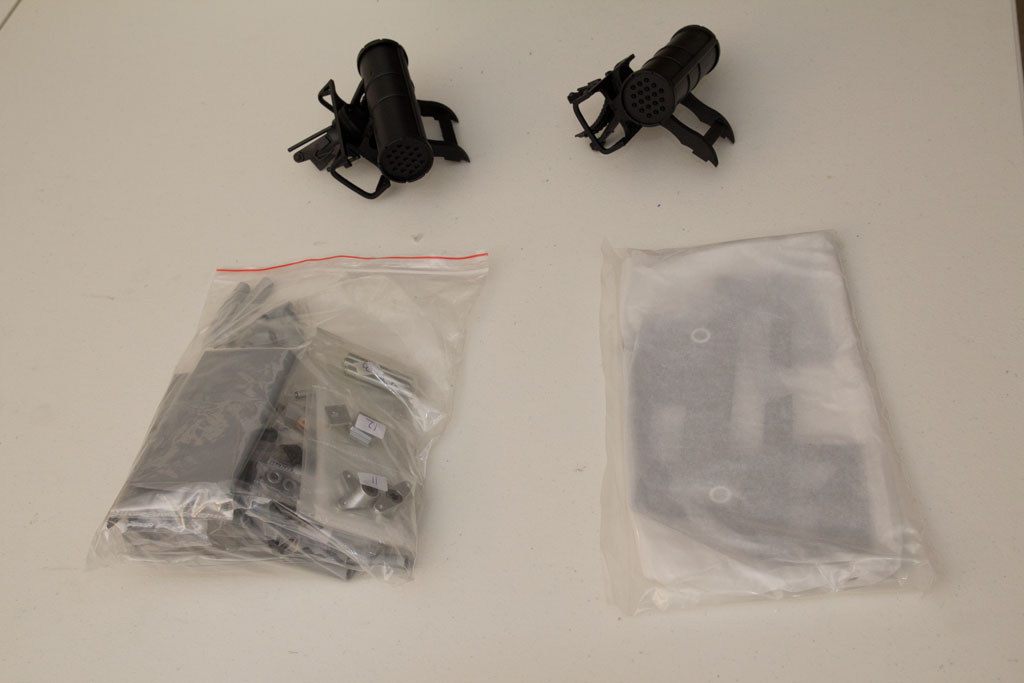 IMG_1411_05 IMG_1411_05 by carguy4471, on Flickr 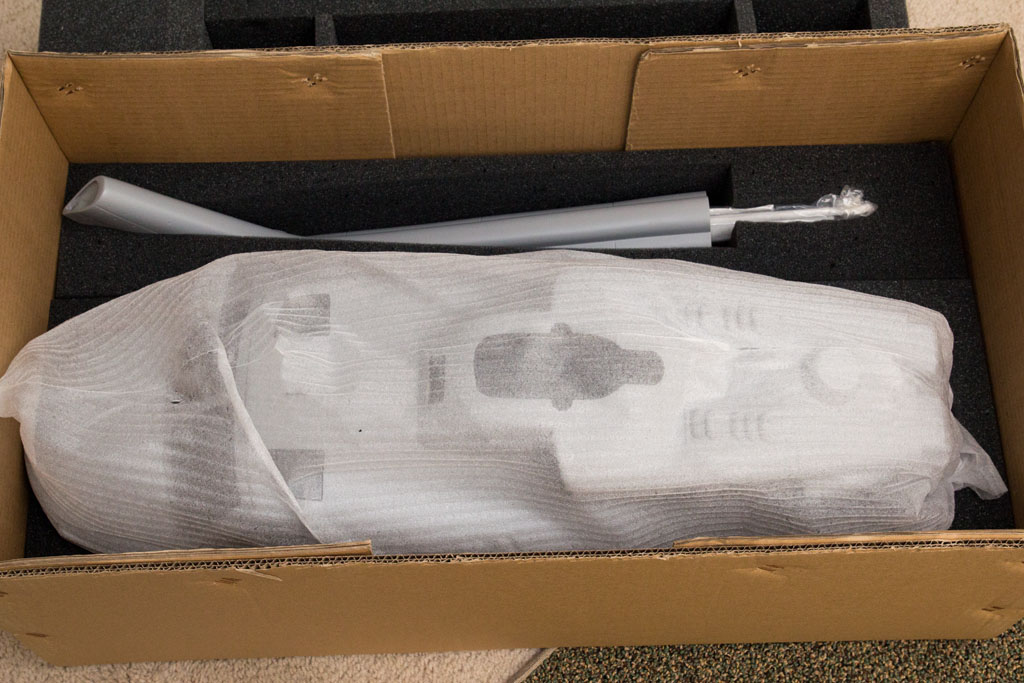 IMG_1413_06 IMG_1413_06 by carguy4471, on Flickr 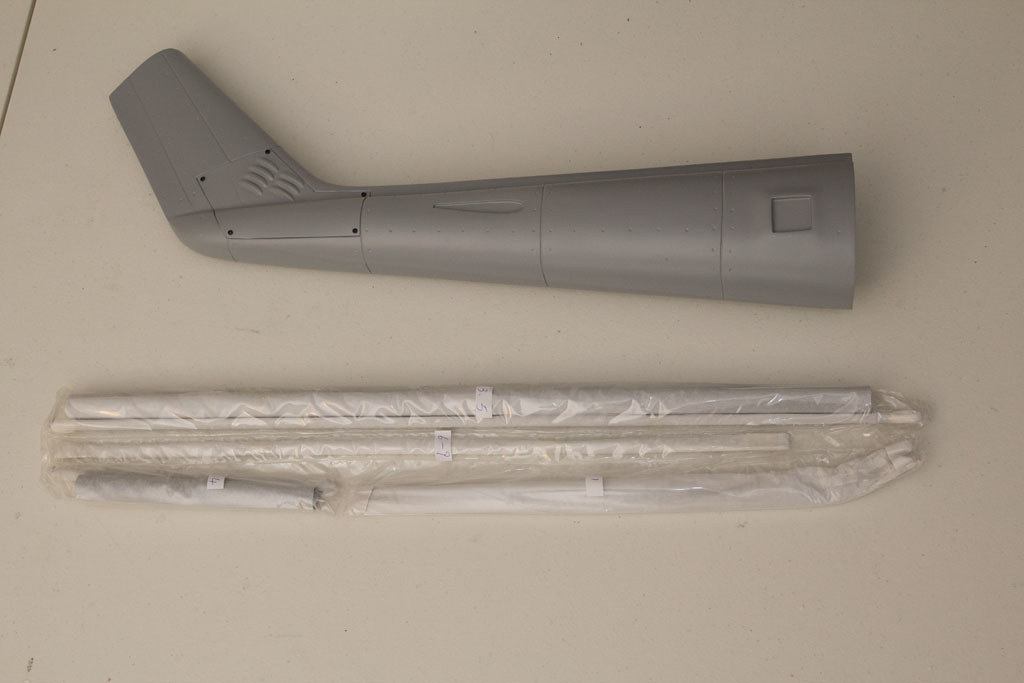 IMG_1414_07 IMG_1414_07 by carguy4471, on Flickr 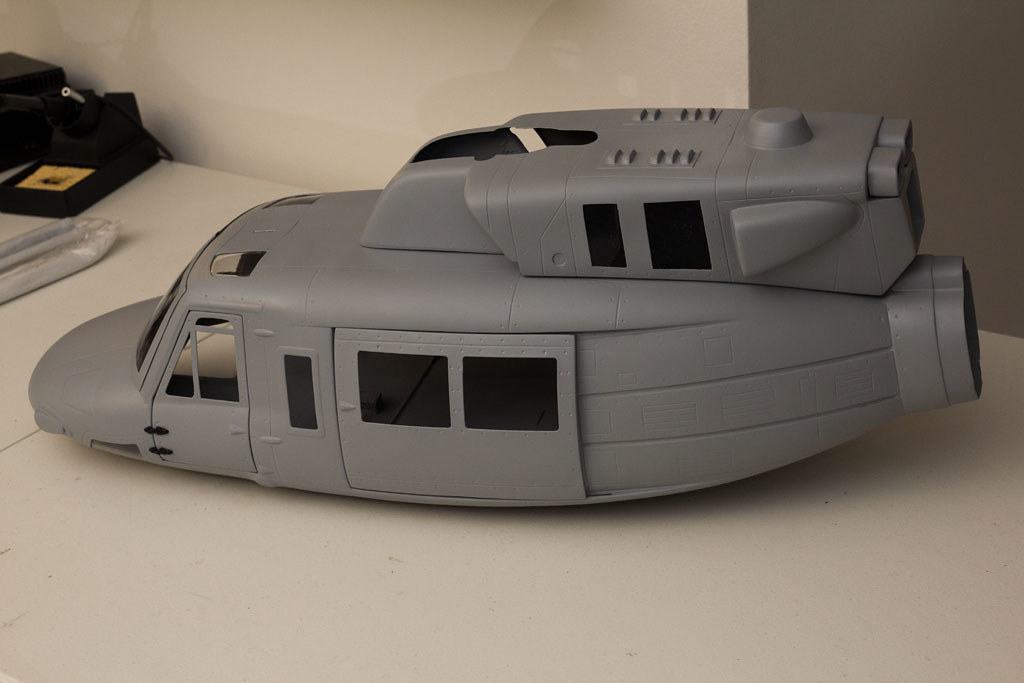 IMG_1415_08 IMG_1415_08 by carguy4471, on Flickr 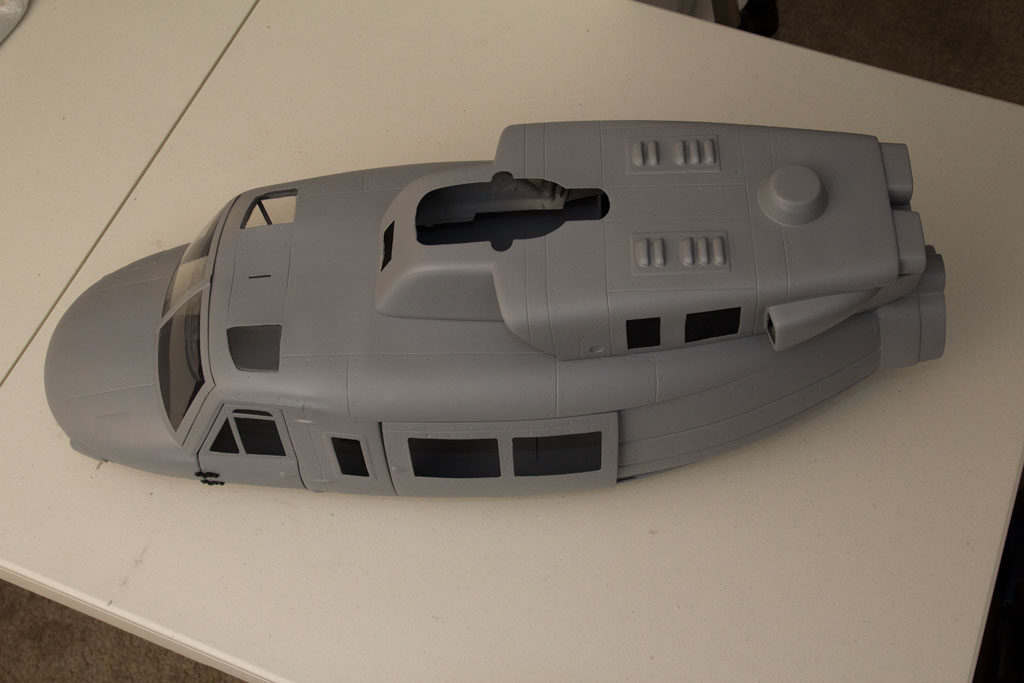 IMG_1416_09 IMG_1416_09 by carguy4471, on Flickr 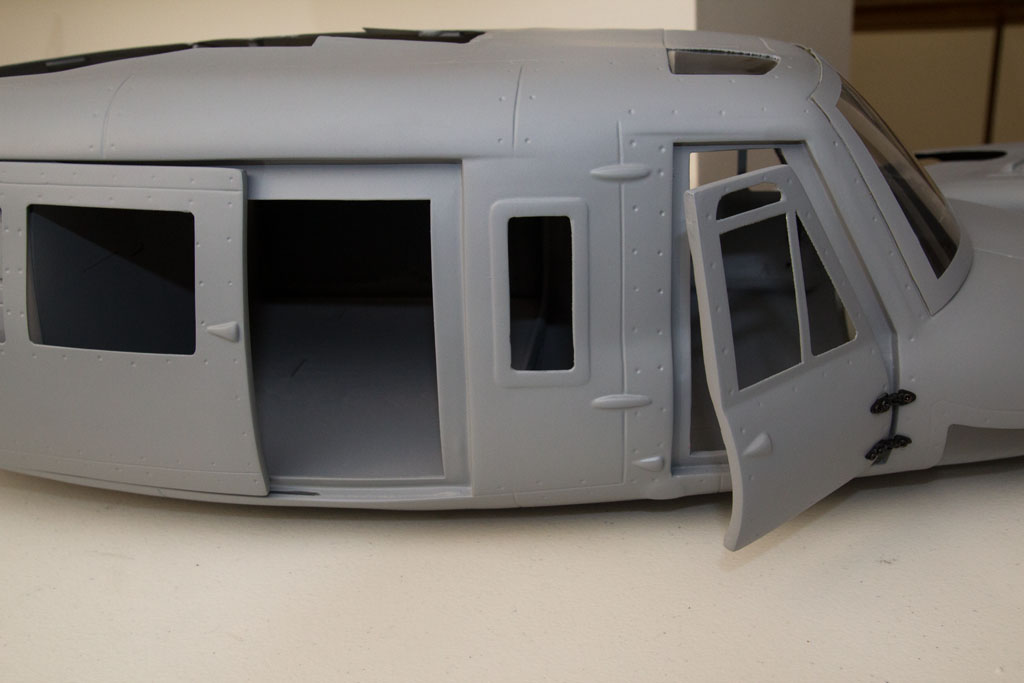 IMG_1417_10 IMG_1417_10 by carguy4471, on Flickr 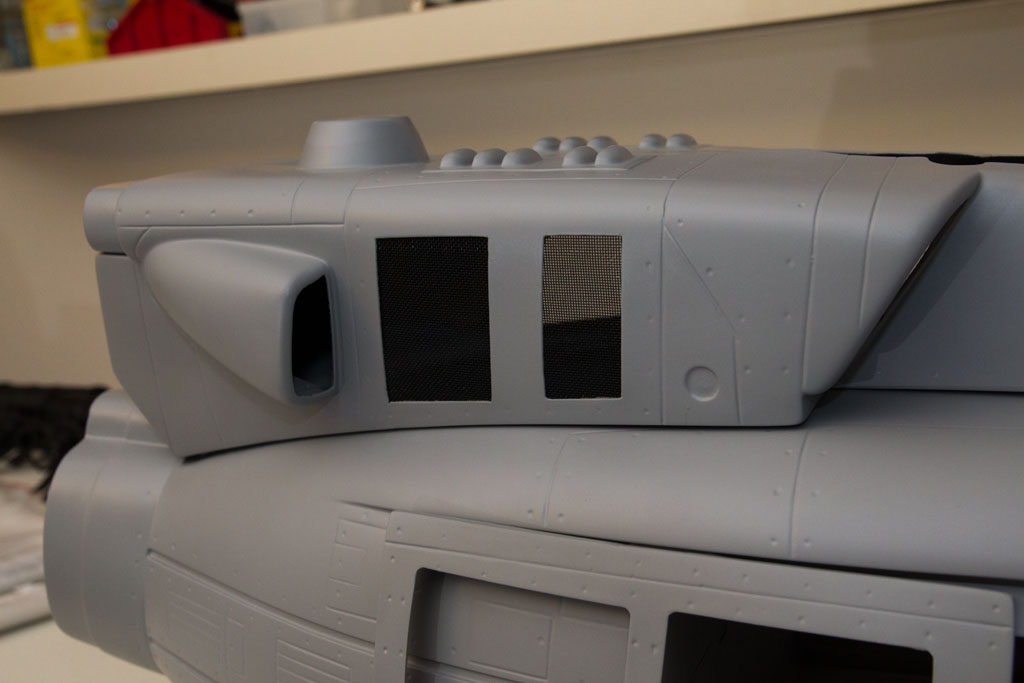 IMG_1419_12 IMG_1419_12 by carguy4471, on Flickr 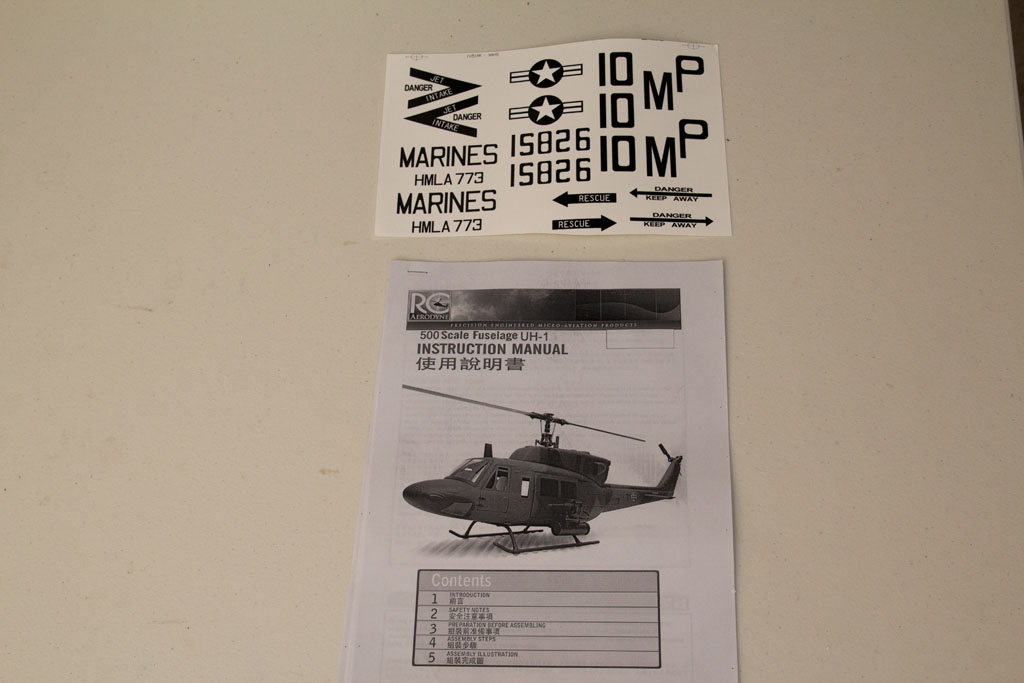 IMG_1425_14 IMG_1425_14 by carguy4471, on Flickr This is the new fuselage that's going to be going together. I'll be updating this thread as the build continues. It'll be posted on a couple forums so more folks can have a look see. As far as the un-boxing goes my impressions thus far are very good. Packaging was stellar. Fiberglass on the fuse is solid, cut well, finished great, and the paint is very nice. This fuse is easily one of the best I've seen, sans one detail, the instructions. These few sheets of paper leave a little bit to the imagination. Mostly in the area of the mechanics. After looking everything over though it doesn't seem as though filling in the blanks will be too terribly difficult. A few more photos yes..... Here is the donor 500 lending it's carcass for a higher calling. 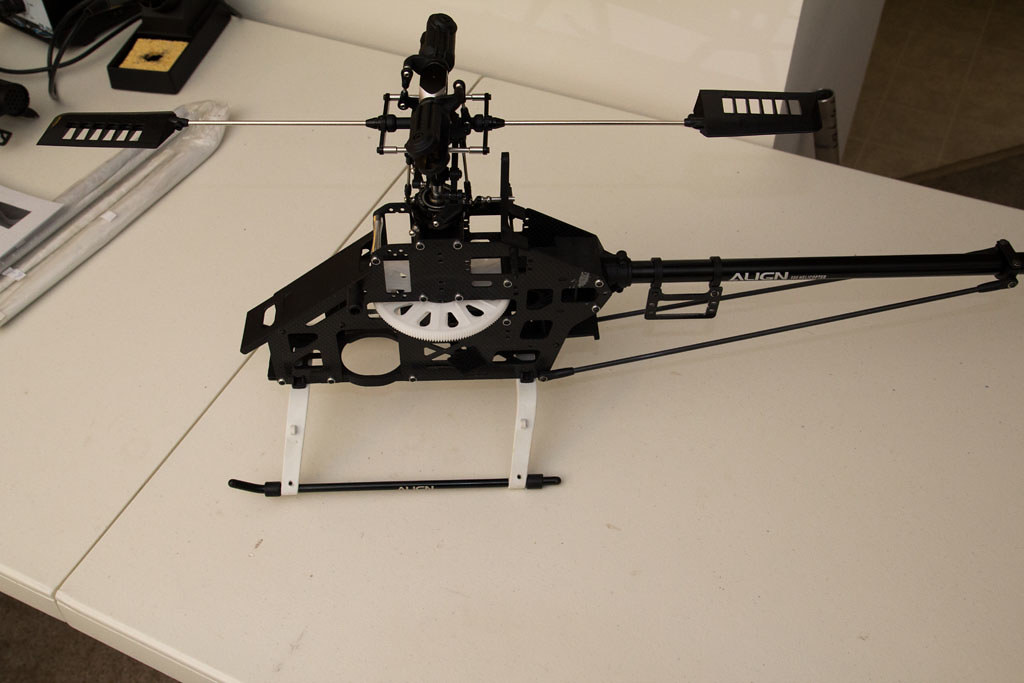 IMG_1427_16 IMG_1427_16 by carguy4471, on Flickr Now, what else is going to be fitted into this gorgeous fuse you ask?? Great question. Let's have a look. 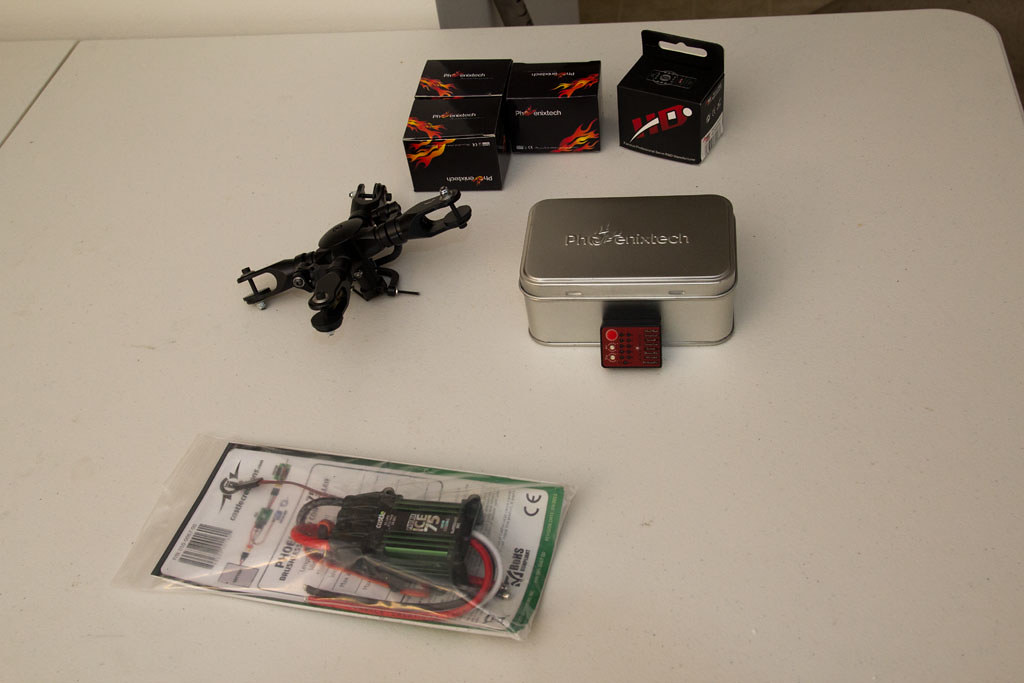 IMG_1428_17 IMG_1428_17 by carguy4471, on Flickr Above you see a handful of servos, an ICE 75 esc, a 4 blade head, and a small red box...... What is that you ask?? Another fine question. It's the new Black Widow flybarless unit by RC Aerodyne. Care for a closer look??  IMG_1429_18 IMG_1429_18 by carguy4471, on Flickr Some of the the mechanics that come with this fuse.... 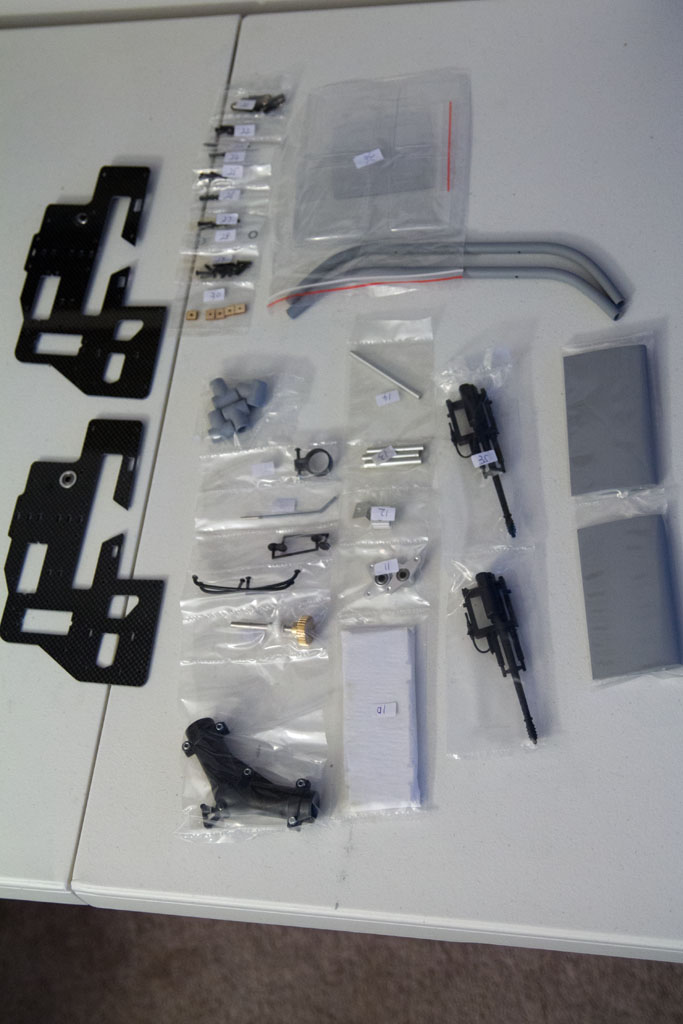 IMG_1461_20 IMG_1461_20 by carguy4471, on Flickr And....  IMG_1470_26 IMG_1470_26 by carguy4471, on Flickr 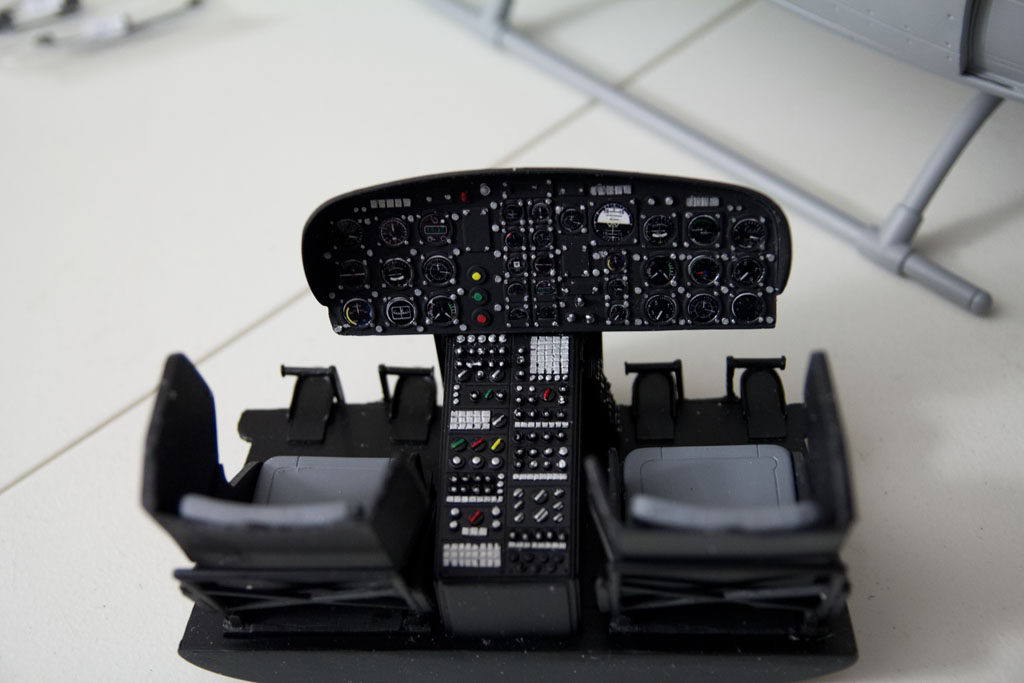 IMG_1469_25 IMG_1469_25 by carguy4471, on Flickr I do like this cockpit. One oddity I've noticed is that I'm not quite sure how this is going to fit through either of the doors. Once I've got this part of the puzzle worked out I'll be sure to let everyone know. Now, the best part of this fuselage is just what you've seen above, the ability to have a scale cockpit and cabin area due to the modified mechanics that move the frame into the doghouse of the heli. It looks like a great setup. I couldn't resist, I had to start things off and start dry fitting the frame set. 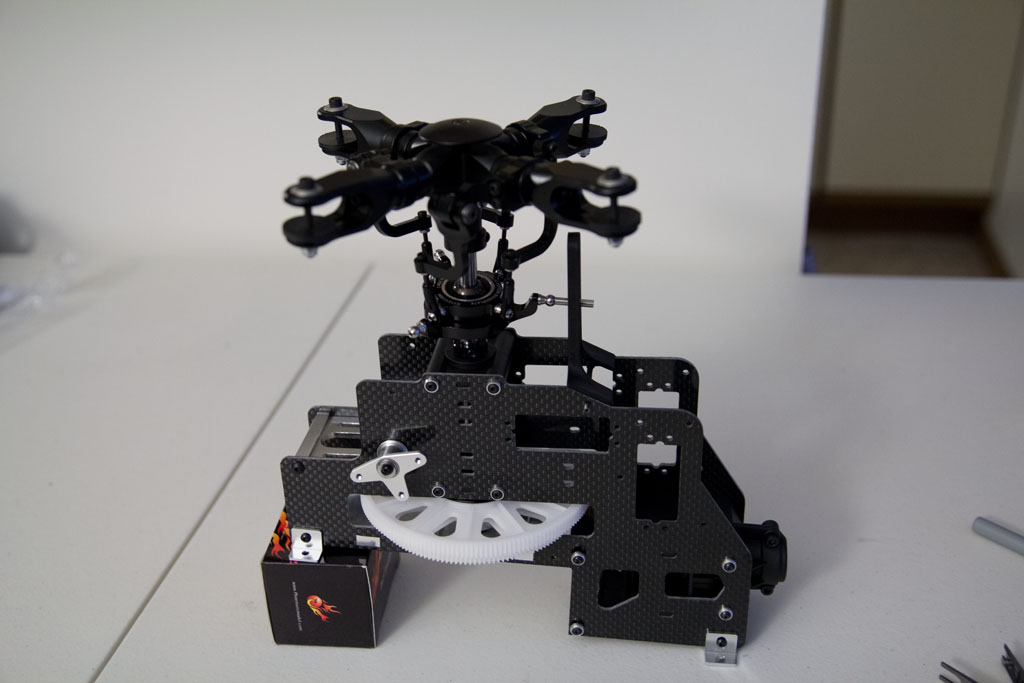 IMG_1465_22 IMG_1465_22 by carguy4471, on Flickr 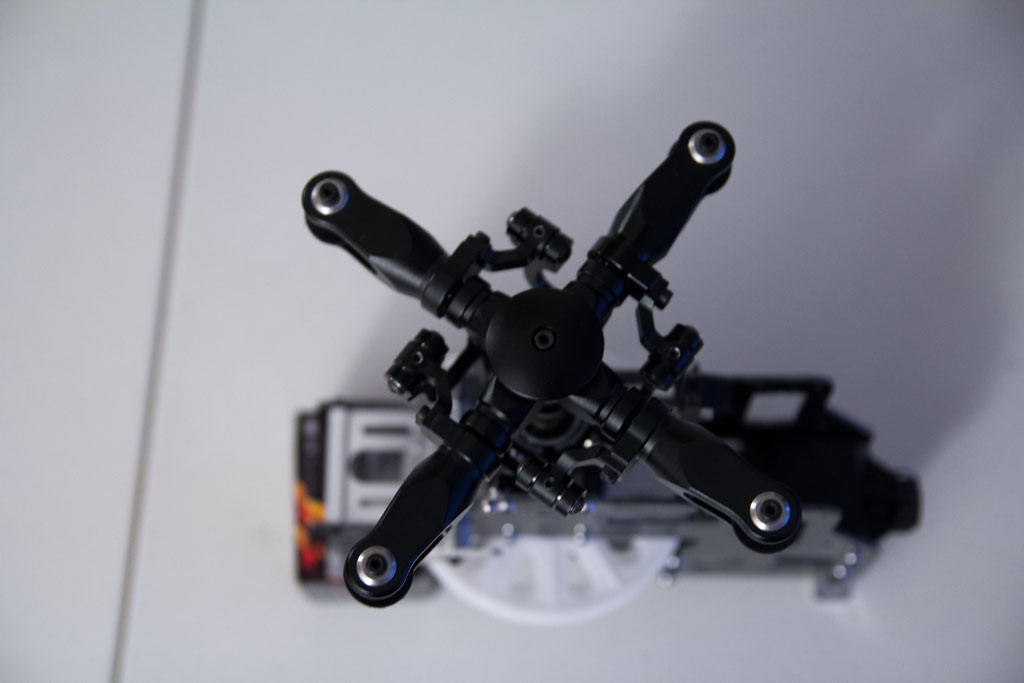 IMG_1467_24 IMG_1467_24 by carguy4471, on Flickr 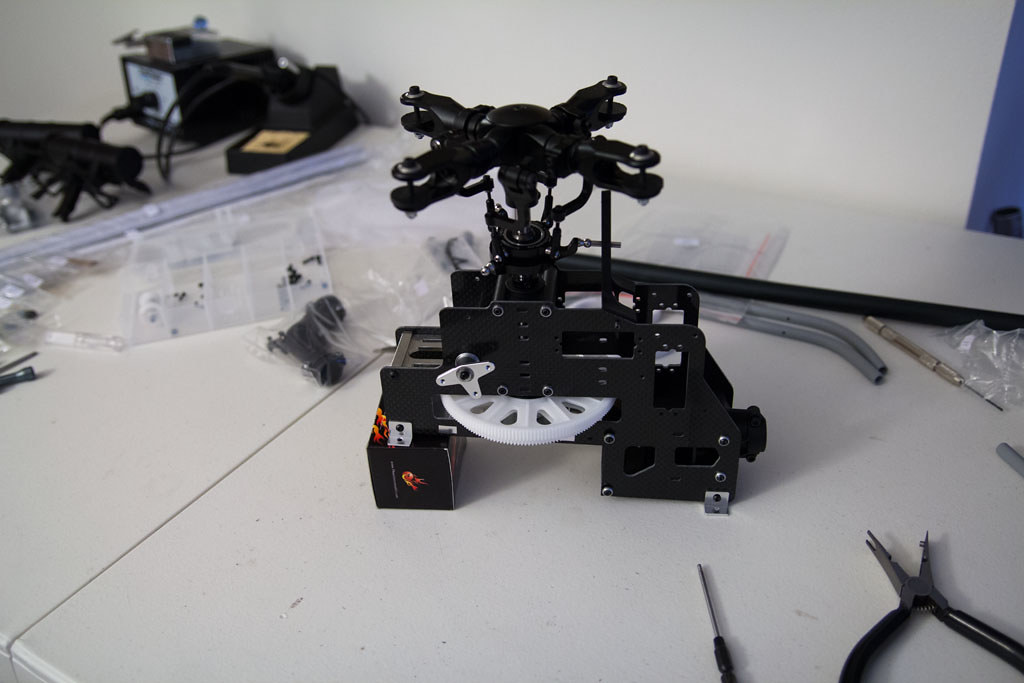 IMG_1463_21 IMG_1463_21 by carguy4471, on Flickr There you have it folks. The beginning of what should be an extremely fun build. I'll update with photos and or video as the build progresses. All comments and questions are welcome!! |
|
|
|
Post by Chris Reibert on Apr 16, 2012 22:57:06 GMT -4
Ah that is looking Great so far!
|
|
mike
ROOKIE

Posts: 8
|
Post by mike on Apr 17, 2012 1:07:01 GMT -4
Cool what lighting system you going to use for nav lights. Is the front window already glued on if not that might be the way to slide the dash and seats in
|
|
|
|
Post by carguy4471 on Apr 17, 2012 1:25:38 GMT -4
Cool what lighting system you going to use for nav lights. Is the front window already glued on if not that might be the way to slide the dash and seats in The fuse came with a set of lights, which looks like it has 2x landing, 2x nav, 2x white strobe and 2x red strobe. Not sure about how it works though as it has 2 switches. I was hoping to be able to turn the landing lights on and off via remote, I have to plug these in to a receiver and see how they work. The front window did come glued in right out of the box. I do have to double check to make sure I have the side door slid open all the way. |
|
|
|
Post by Dr. Evil on Apr 17, 2012 8:36:22 GMT -4
Cool what lighting system you going to use for nav lights. Is the front window already glued on if not that might be the way to slide the dash and seats in The fuse came with a set of lights, which looks like it has 2x landing, 2x nav, 2x white strobe and 2x red strobe. Not sure about how it works though as it has 2 switches. I was hoping to be able to turn the landing lights on and off via remote, I have to plug these in to a receiver and see how they work. The front window did come glued in right out of the box. I do have to double check to make sure I have the side door slid open all the way. Looking good there dude...keep us updated and posted on your build process. Now...I can't wait till start on mine...LOL. Damn, all you scale guys...LOL. |
|
|
|
Post by carguy4471 on Apr 17, 2012 21:29:56 GMT -4
The lighting kit that came with the fuselage.....
|
|
bobsp12
FUN FLYER
 The CHAOS theory rules my life
Posts: 155
|
Post by bobsp12 on Apr 17, 2012 22:05:31 GMT -4
carguy4771...if the scale cockpit is like the 600 size UH-1N, and it looks like it is, then you need to dissasemble it to fit it. The main instrument panel and the seats are attached by double sided tape.
Take the seats out and lift off the instrument panel. Fit the base of the cockpit into the cabin through the sliding side doors and then slide in the instrument panel and the seats. Install some new double sided tape before you put the bits in and then you can epoxy the control columns etc in.
You need to do it a few times to get it right and leave it until last for the final install, as you can hide some of the lighting wiring under the cockpit floor. You will probably need to epoxy in the cockpit floor to stop it moving around, so it is one of the last things to fit on the heli.
|
|
|
|
Post by carguy4471 on Apr 17, 2012 22:36:40 GMT -4
carguy4771...if the scale cockpit is like the 600 size UH-1N, and it looks like it is, then you need to dissasemble it to fit it. The main instrument panel and the seats are attached by double sided tape. Take the seats out and lift off the instrument panel. Fit the base of the cockpit into the cabin through the sliding side doors and then slide in the instrument panel and the seats. Install some new double sided tape before you put the bits in and then you can epoxy the control columns etc in. You need to do it a few times to get it right and leave it until last for the final install, as you can hide some of the lighting wiring under the cockpit floor. You will probably need to epoxy in the cockpit floor to stop it moving around, so it is one of the last things to fit on the heli. I appreciate the insight. I was trying to get it through the door without the dash and seats on it. As it turns out (had to ask cliff), it can't fit through the door. I'll need to remove the door from the fuselage to have room to get it through. I was just checking out some of my lighting tonight and was thinking along the lines of what you just mentioned about the lights as well. Looks like I'll have a couple wires running underneath the cockpit. I was still trying to clear it all up in my head so you helped speed that process up a bit. I appreciate the pointers!!! |
|
bobsp12
FUN FLYER
The CHAOS theory rules my life
Posts: 155
|
Post by bobsp12 on Apr 18, 2012 6:16:48 GMT -4
I am looking forward to how your heli looks and flies carguy4471...it looks nice so far...I have the 600 version, the black/olive drab colour.
It's nice to see that there are differences in the fuse for the US Marines version that you have...I am under the impression that the 600 one in the colour that you have didn't have the fuselage IR pods molded into it like yours.
|
|
|
|
Post by carguy4471 on Apr 18, 2012 8:09:57 GMT -4
I am looking forward to how your heli looks and flies carguy4471...it looks nice so far...I have the 600 version, the black/olive drab colour. It's nice to see that there are differences in the fuse for the US Marines version that you have...I am under the impression that the 600 one in the colour that you have didn't have the fuselage IR pods molded into it like yours. This is certainly a pretty accurate fuse. I worked on the UH-1N in the Marines with HMLA-369 before the "Y" conversion. There aren't many things on this fuse for me to nitpick, in fact, nearly none. The only thing I've gone and monkeyed up is the 4 blade head. But then I can just say it's a "Y" and not be completely accurate. I'm ok with that I guess. I've got a call in to an airbrush artist to hopefully get some exhaust burn done down the tail boom and get the exhaust ports done in the correct color. Possibly a couple other little touches. |
|
|
|
Post by wayne on Apr 18, 2012 11:44:21 GMT -4
Thank you sir, may I have another? very very nice
|
|
|
|
Post by carguy4471 on Apr 18, 2012 22:49:53 GMT -4
Got to sit down this evening and do a little bit more rough assembly of the UH-1. I'm going to have the heli on display this weekend, even though it wont be done so I'm trying to get it roughly put together. I tell ya, it gets messy on the workbench. 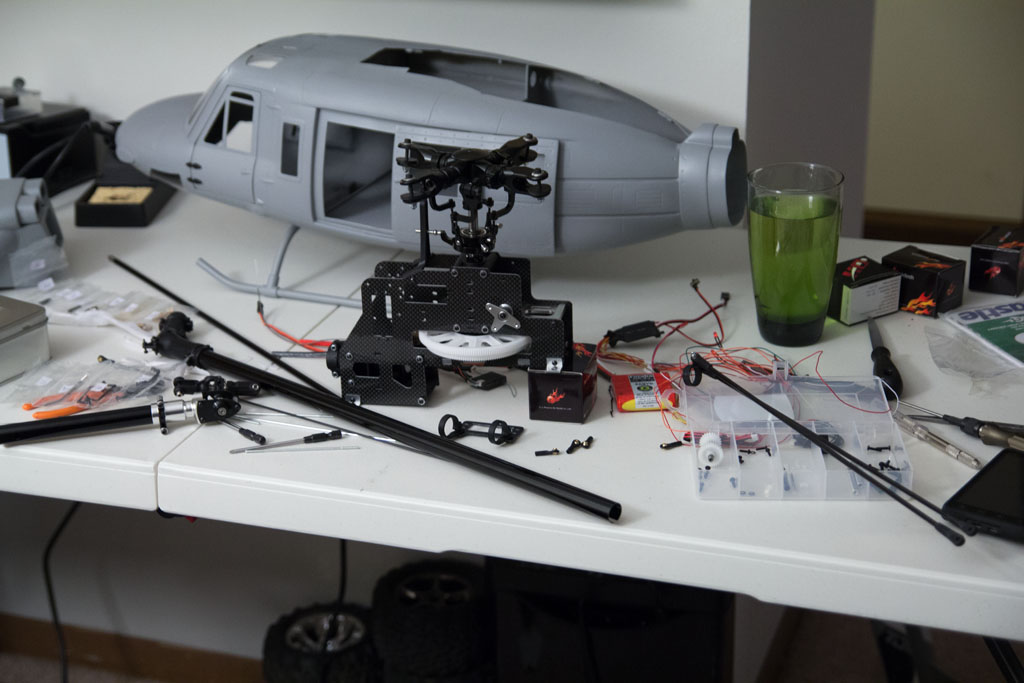 IMG_1481_01 IMG_1481_01 by carguy4471, on Flickr Got the primary tailboom and supports installed. 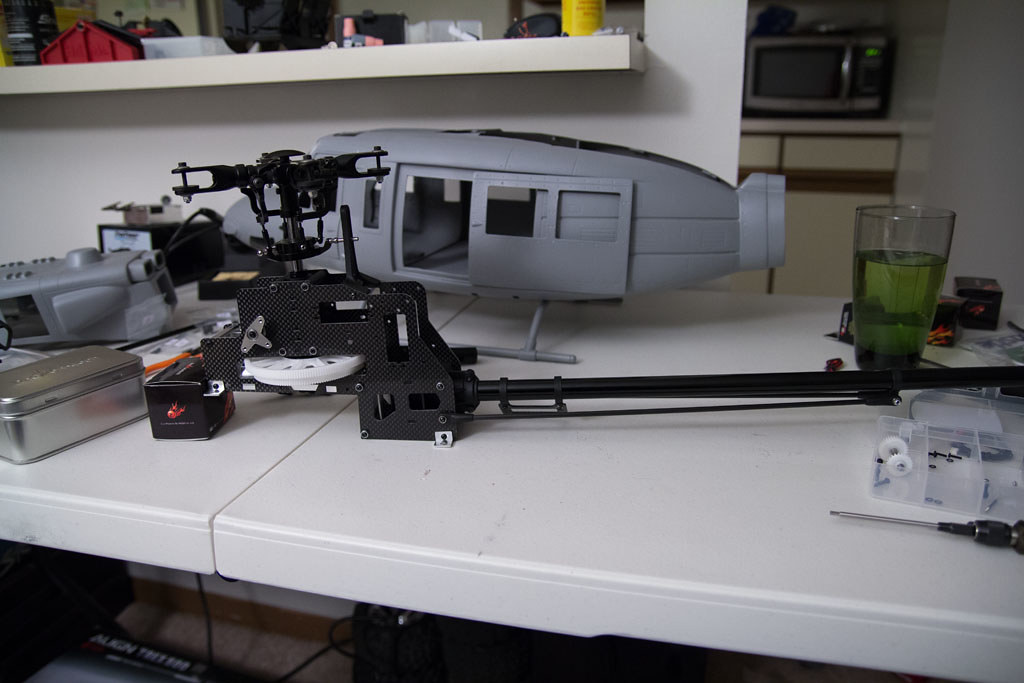 IMG_1488_03 IMG_1488_03 by carguy4471, on Flickr Also rough installed the fuselage boom. A few size comparisons to a standard 500. The 500 is on training wheels (birthday gift for my brother).  IMG_1490_04 IMG_1490_04 by carguy4471, on Flickr 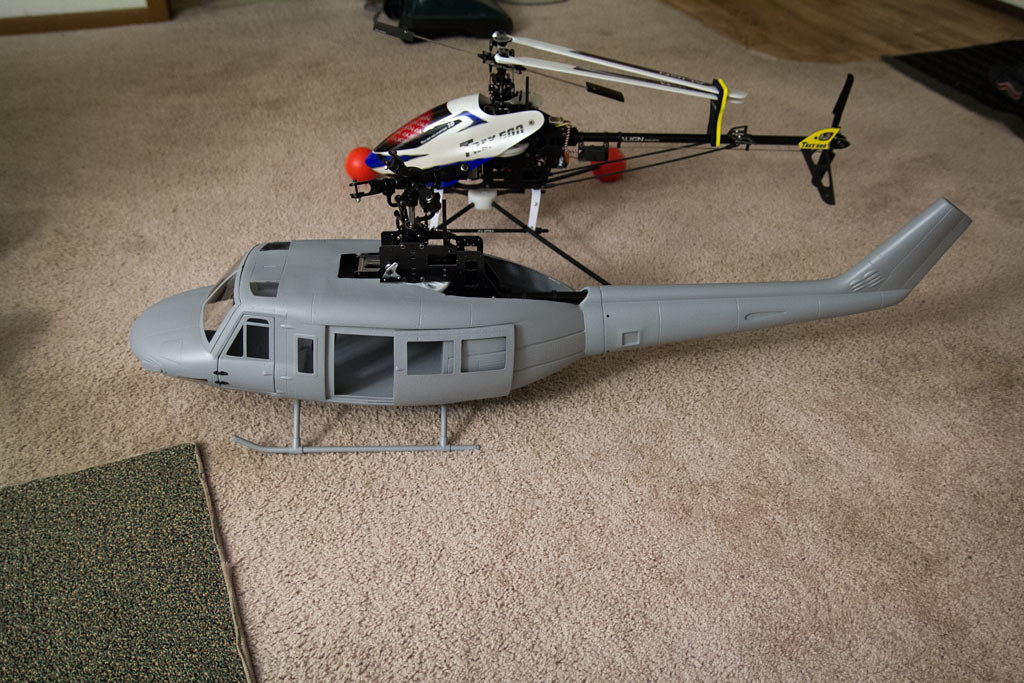 IMG_1492_05 IMG_1492_05 by carguy4471, on Flickr 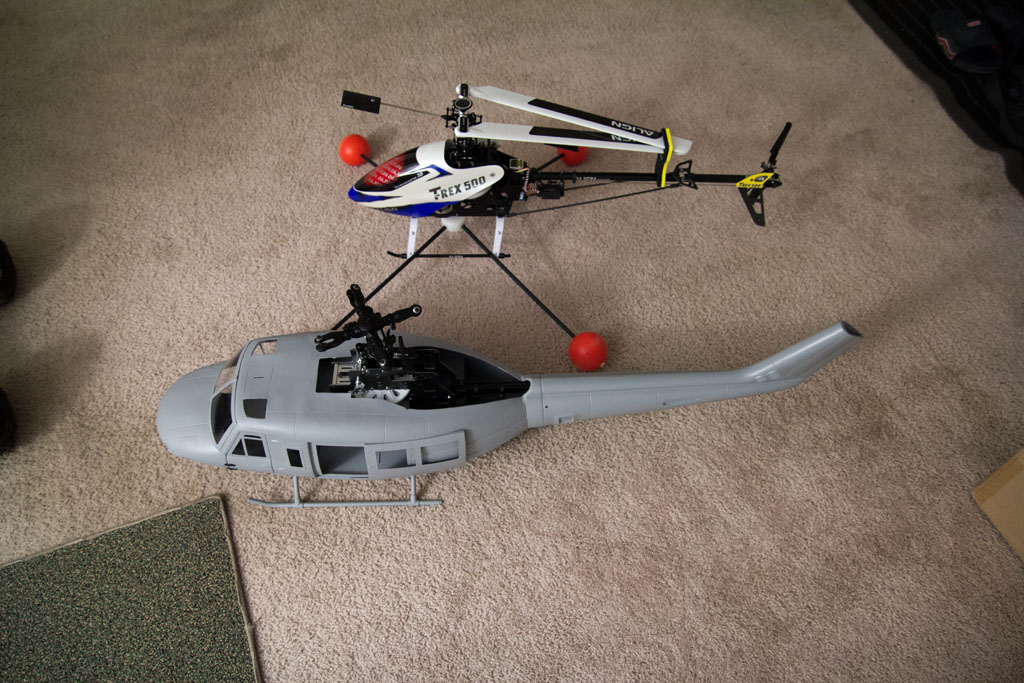 IMG_1493_06 IMG_1493_06 by carguy4471, on Flickr Compared to an align 500 sized airwolf. 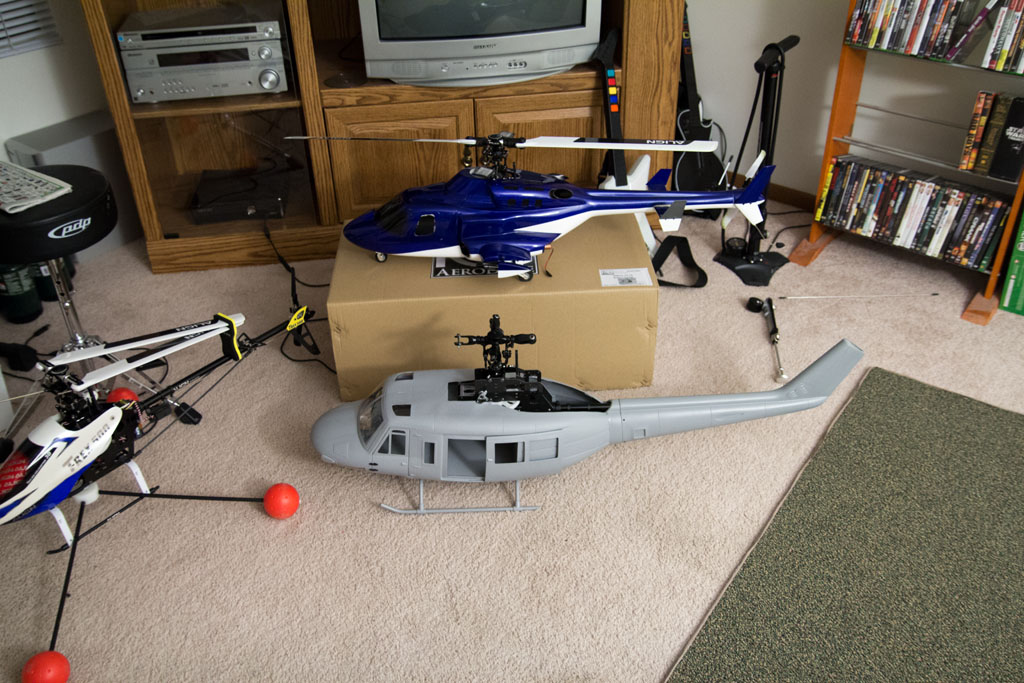 IMG_1495_08 IMG_1495_08 by carguy4471, on Flickr Coming along nicely. What a great ornament in the living room!! 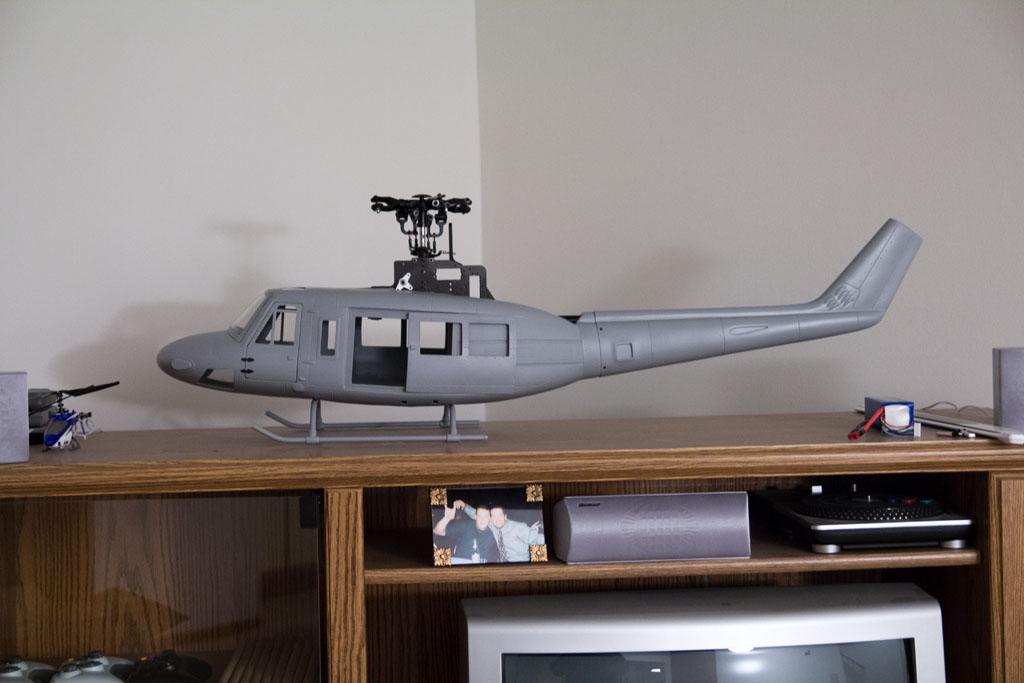 IMG_1494_07 IMG_1494_07 by carguy4471, on Flickr |
|
mike
ROOKIE
Posts: 8
|
Post by mike on Apr 18, 2012 23:39:02 GMT -4
Nice looking 500 fuse, could you post some pics on how the mechanics are secured to the fuse. Get some scale fittings on the outside and it will look sick. You could pick up some weathering chalk for model railroads and add your exhaust marks that way. You would just have to practice on a piece of plastruct or something to get it down and the look you want before applying it to the fuse.
Mike
|
|
|
|
Post by carguy4471 on Apr 19, 2012 5:52:11 GMT -4
Nice looking 500 fuse, could you post some pics on how the mechanics are secured to the fuse. Get some scale fittings on the outside and it will look sick. You could pick up some weathering chalk for model railroads and add your exhaust marks that way. You would just have to practice on a piece of plastruct or something to get it down and the look you want before applying it to the fuse. Mike Mike, I shot a couple photos for you before heading off to work this morning. Here are the forward anchor bolts for the mechanics. Only one is currently installed. 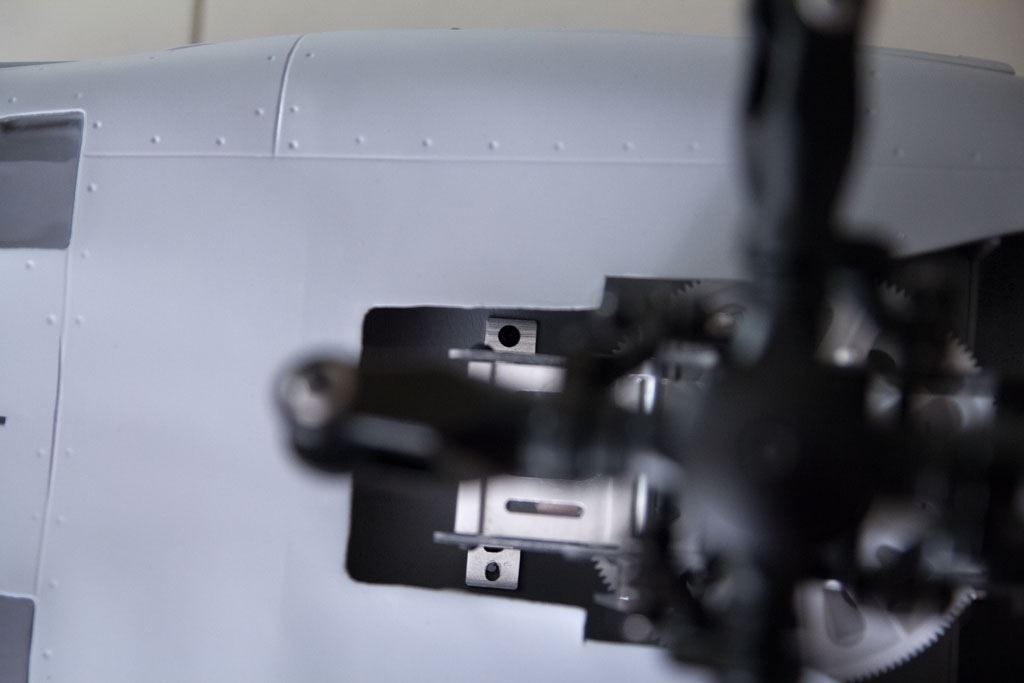 IMG_1499_01 IMG_1499_01 by carguy4471, on Flickr And the rear bolts. 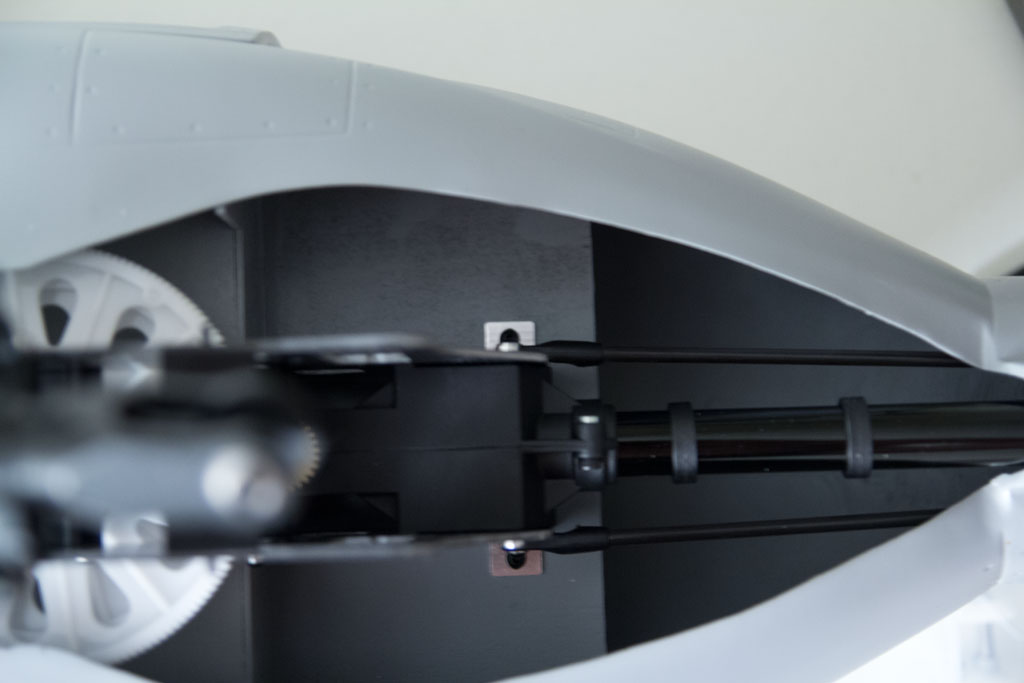 IMG_1501_02 IMG_1501_02 by carguy4471, on Flickr And here are a couple of the fixings you mentioned. There are 4 handles and the stinger in the bags, and of course the rocket pods and guns.  IMG_1503_03 IMG_1503_03 by carguy4471, on Flickr I forgot to grab the other little bags. There are obviously the rear horizontal fins, also an antenna for above the windscreen. Maybe a couple other small items. The kit does come with some nice scale fittings. |
|
|
|
Post by Chris Reibert on Apr 19, 2012 8:44:25 GMT -4
Coming together nice!
Is there a way to test fly the mechanics outside of the fuse?
|
|


 ? seems like a decent deal for 749. !!!!!