|
|
Post by harpy on Aug 22, 2013 13:23:17 GMT -4
I am making pretty good progress with my build, but like Luckyarmpit I have the exact same issue with the main drive gear and the auto rotation gear (my is an older kit like his). I see Align has a CNC drive gear upgrade, but wasn't sure if that was direct fit or the down sides of running a metal gear. The other issue is 2 of the 5 would not come out and I managed to strip them (my fault) making a gear swap a pain because they will have to be drilled out. Right now I am leaning toward getting an Align regular gear set or just shimming it. Just wondering the best course of action. It won't be airborne anytime soon, so I am not in a rush.
Thanks,
Jim
|
|
|
|
Post by Valkman on Aug 22, 2013 18:31:52 GMT -4
Hi Harpy. I'm a bit confused! What metal gear are you talking about? I know Align do a CNC main gear but it is not metal but CNC plastic. CNC does not mean it is metal but made on a CNC machine. Plastic can run on a CNC machine quicker and more cheap because of speed and the bits last longer. Maybe I'm missing something here and there is another new product out made of metal. Or maybe I should just go to bed!
If you ever think that you are about to "run" a screw, heat up the screwdriver with a flame or something and use it straight away. I know you can use lots of other methods, but it is handy when working on a plastic main gear as you cannot use the butane torch lol.
I would just go the standard route, unless your planning on more power later then I would go the KDE route and upgrade the hub and main gear. I never tried the slanted gears. I have heard good and bad but I do believe they are a lot quieter. I suppose if I was going the standard route I would try the slanted gears.
|
|
|
|
Post by harpy on Aug 22, 2013 19:21:31 GMT -4
You are confused because I don't know what I am talking about. It's the 112 tooth CNC from some material other than metal. I saw CNC and assumed it was aluminum. I just went with another standard drive gear and a newer main gear case set. Other than that, the build is going well. Thanks for the heat tip too.
|
|
|
|
Post by harpy on Aug 24, 2013 11:52:24 GMT -4
A fully nude Chaos. The last heli I built was in 98, so I can see they have come a long way. The main build issue I had was the main gear drive assembly like stated above. I think it could have easily been fixed by adding another shim, however, stripped two screws on the gear hub by using a cheap worn out allen wrench which didn't even need to come out to add the shim. I saw Align had a newer main gear assembly and just opted for that instead of drilling the stripped screws. 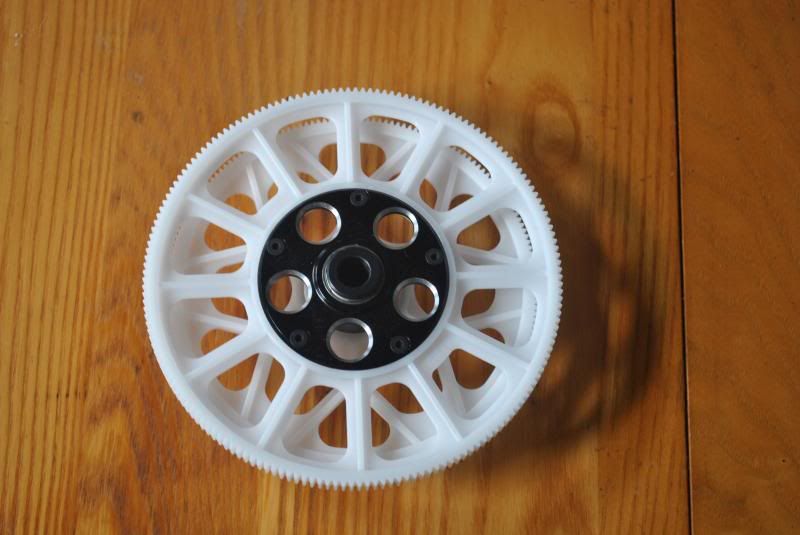 The Align assembly wouldn't fit on the main shaft and thought they were not compatible. I did some very light hand sanding with some 320 sand paper on the narrow part of the shaft. I don't think I removed any material save for some tiny burs that may have been the cause of the binding. 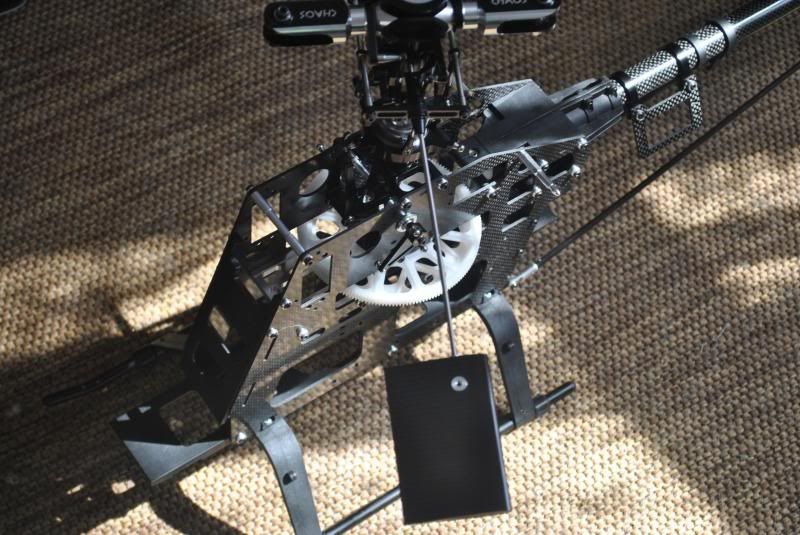 Here is the basic assemblly. The drive train truns as smooth as butter. I spent a lot of time adjusting for even the smallest bind or catch in the drive train. |
|
|
|
Post by Dr. Evil on Aug 24, 2013 23:30:44 GMT -4
Looking good there Harpy!
|
|
|
|
Post by edintexas on Aug 25, 2013 6:26:15 GMT -4
Harpy,
Bird is lookin' good.
You probably already know it but I can't help pointing out that your flybar paddles are backwards.
I fly my 600 on 6S and I found that tilting the battery tray to the outward position improved my C.G.
One more tip (from the voice of experience)...
I'm ashamed to say that I can now change a set of tail drive gears in about half an hour. Ashamed because I've gone through 7 or 8 sets due to tail first landings. But before I got smart and mounted the gyro on the tray below the tail drive gear box it took much longer. If you mount the gyro on top of the gearbox, as I did at first, you will have to remove it first before you can pull the tail. Then you'll end up having to clean up the remains of the double stick mounting pad on both the gyro and gearbox before you put it back. Putting it on the tray makes the whole process of removing the tail a snap. Protects it better from crash damage too. Hopefully you will be a much better pilot than me. But my gear train is REALLY sensitive to coming in tail first, even in nothing harder than tall grass.
Random thoughts from a cluttered mind! :>
|
|
|
|
Post by harpy on Aug 25, 2013 13:23:56 GMT -4
Thanks Ed,
I haven't set in the fly bars yet. I still have to go over everything and double check. Any tips are invaluable to me and will mount the gyro there. One of my most vivid memories was crashing my Nexus into my car with the damaged rotor blade flogging the car door. I am sure I will become pretty proficient in rebuilding.
|
|
|
|
Post by Chris Reibert on Aug 25, 2013 21:56:28 GMT -4
Thanks Ed, I haven't set in the fly bars yet. I still have to go over everything and double check. Any tips are invaluable to me and will mount the gyro there. One of my most vivid memories was crashing my Nexus into my car with the damaged rotor blade flogging the car door. I am sure I will become pretty proficient in rebuilding. Oh snap Kyosho Nexus 30... I had one of those! |
|
|
|
Post by harpy on Sept 25, 2013 15:03:44 GMT -4
Had a quick build question. I am using the Align Servo Wheel and instructions say to mount the ball linkage on the inner hole for flybarless and on the outer for flybar. I am going to run without a flybar, but was wondering if using the outer hole might mellow it out some or doesn't matter with a 3 axis gyro? 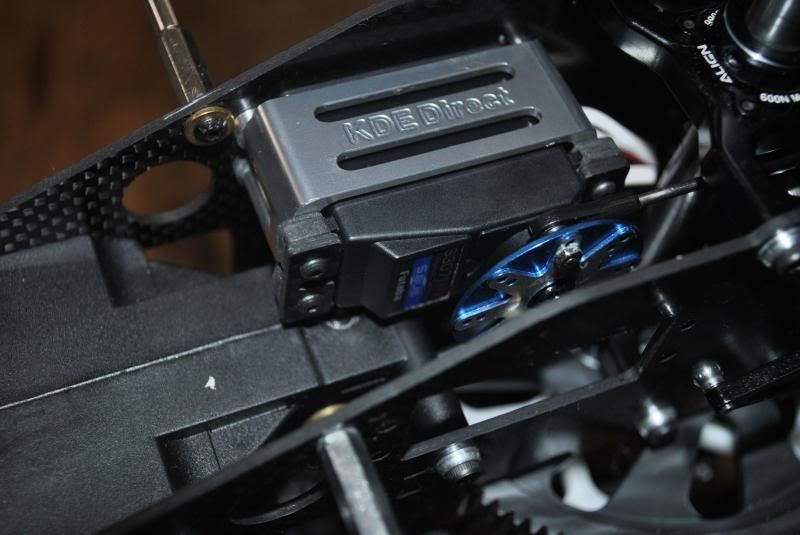 |
|
|
|
Post by harpy on Oct 8, 2013 12:02:53 GMT -4
A little more progress. Got the speed controller, cap pack, and voltage sensor wires run. This was about the only place I could think of to mount it. On the plus side you just need to take out 6 screws to get to it and there is an opening beneath as well on the sides of the frame for air flow. Negative side if it catches fire it is fairly close to the electronics. 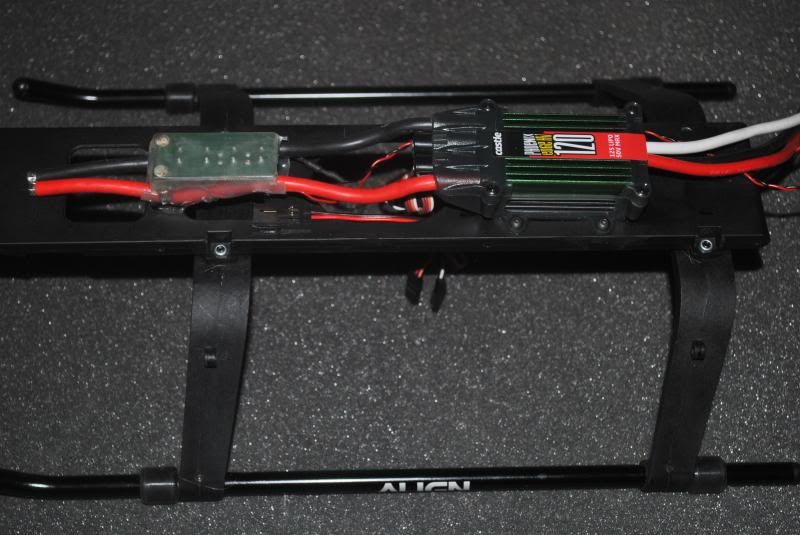 |
|
|
|
Post by Dr. Evil on Oct 10, 2013 16:59:21 GMT -4
Had a quick build question. I am using the Align Servo Wheel and instructions say to mount the ball linkage on the inner hole for flybarless and on the outer for flybar. I am going to run without a flybar, but was wondering if using the outer hole might mellow it out some or doesn't matter with a 3 axis gyro? Hey Harpy, personally I don't think it matters much but can't say for sure so I hope you've gotten your answer for your question somewhere. Good to see your bird coming together! |
|
|
|
Post by harpy on Oct 10, 2013 23:59:16 GMT -4
Hey Thanks Dr. Evil. I moved them back out with the same thought. I also had a lot of trouble soldering the 8 gauge wire on the ESC. I did the back 10 gauge motor connector with no issues and thought cranking the iron up 10c for the front battery termination I would be good. For whatever reason it turned into a 6 hour ordeal (poor connector choice, lack of patience). I ended cutting of the lead wires at the cap pack and soldering the a battery lead to the cap pack posts. I think in theory it was a bad idea to break the ESC leads like that. Basically there are 4 solder joints to fail and added resistance.
Rebuilt some tube amps and used pretty thin wire that carried some pretty high voltage, but I don't think those produced the amps found in the helis. If I were doing it again I would have made my own ripple filter, not broken the leads, and not have put so much heat into the ESC. One the plus side, though, I hooked up the 2 6s batteries and got proper voltages along the circuit, sensor leads, and nothing went up in smoke. Going try see if it will talks to the PC tonight. Anyway... that's the news from Ohio.
|
|
|
|
Post by harpy on Oct 14, 2013 15:05:03 GMT -4
All the power run and wiring run ready for the gyro and receiver installation. 2 6s up front and a 2s behind them for the electronics behind them. Also jacked up the skids with rubber bushing the raise the air frame from for better clearance of the 800 tail fin. Still may be a little low. 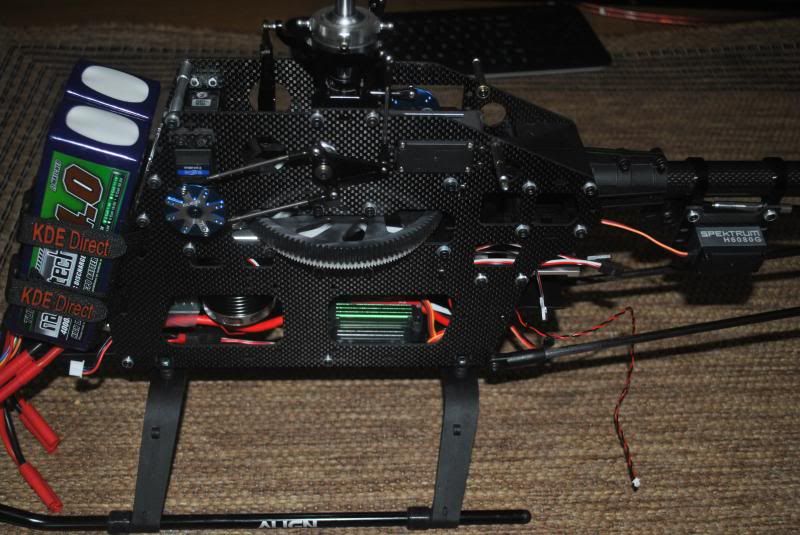 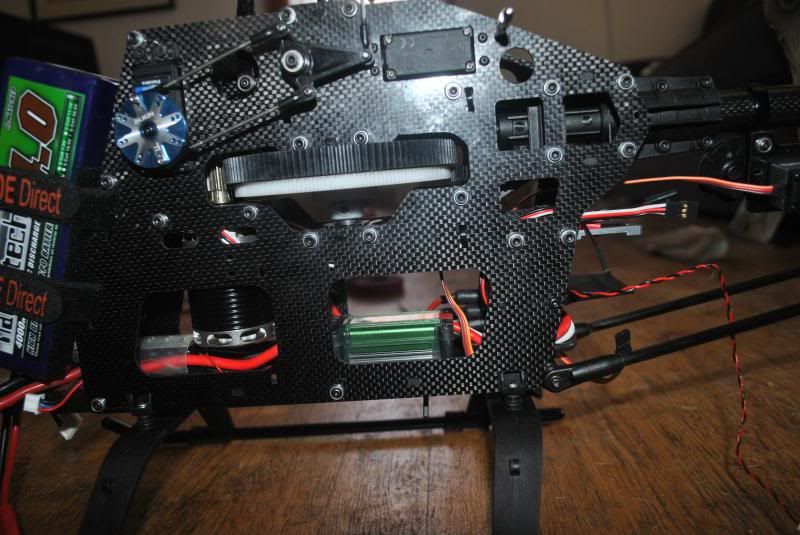 |
|
|
|
Post by Chris Reibert on Oct 15, 2013 23:23:55 GMT -4
Looking good Harpy!
|
|
|
|
Post by harpy on Oct 20, 2013 19:45:01 GMT -4
Thanks, CR Here are my wiring woes. A Futaba receiver with SBus Hub in beside for sensors. You'd think an SBus receiver might work with a SBus compatible DJI Nasa Gyro, but sadly it doesn't with this receiver. I guess since it has the SBus 2 port the main SBus port adds an extra bit which the Nasa H can't understand. It has been fixed with a firmware upgrade on the multi rotor units, but not the "H" yet.  |
|


 ? seems like a decent deal for 749. !!!!!