|
|
Post by chitty024 on Feb 10, 2012 2:07:07 GMT -4
thanks for the info Valkman! Thanks Dr. Evil! I am about 3 hours in now. Only problem I have so far is the instructions are only in the PC which is in a different room from my workspace. Oh well! This is soooo exciting! At first I was like WTF sooo many packages! I soon realized how exciting opening each little package is! It's like a million presents!
|
|
|
|
Post by chitty024 on Feb 10, 2012 3:09:41 GMT -4
OK first set of questions!  1. The main bearings have a knub on the end that is supposed to fit into the frame, they do not and I do not want to force them in and break the frame. Do I just get a small file and open the hole a bit? 2. The directions do not show placing the 3rd bearing. Does it go the same way up as the other two? 3. Where at in the tail shaft is the bearing supposed to sit? I am guessing the middle and if so does anyone have tips on getting it in there? 4. What is the best method of measuring the length of the pushrods? Caliper? 5. In the bag with the tail boom supports there is a bar that looks like the flybar but is shorter....unless I used the wrong one for the flybar lol. It is bare metal and has threaded ends. Also with it the is a piece of what looks like a small black straw but long and narrow. What are these 2 objects for? Thank you for the help guys! |
|
|
|
Post by Valkman on Feb 10, 2012 5:42:06 GMT -4
My kit was ARTF so I just stripped and rebuilt everything but I will help as much as I can in case you want to get moving...
1....As far as I know you may have to slightly file the hole. It will file easily as its carbon. I have read most people do this. While you are at it slightly sand all the sharp edges so they won't cut into any wires that will be over them.
2 Yes the same way. The instructions are more than likey for the ALign which has only two bearing blocks.
3 Yes in the middle. Use the tube that the torque tube came in to puch it in there.
4 Yes a caliper or micro meter. Very important. You can pick them up for less than 15 us.You can also use this to make sure you flybar then your paddles are dead center.
5 That sounds like your tail push rod for connecting you tail servo to the tail lever. Its ok to use but make sure the rod guides are not loose. Most, like me, have done away with it. I just made one up from an old carbon rod/links and holders I had lying around.
Hope this helps buddy.....
|
|
|
|
Post by Dr. Evil on Feb 10, 2012 9:59:58 GMT -4
+1 on what Valkman said......
1. I didn't need to sand mine, the main metal bearing block tabs inserted into the frames fine but if you need to do it as Valkman described.
2. Correct, same way.
3. Correct again...use that long clear plastic tube to push into the center area of the boom. TIP "grease/lube that rubber bearing bushing for easy insert".
4. Correct.
5. The newer version kits now comes with the old "metal" tail push rod along with the carbon one as well. Most ppl are using the carbon but its your choice so it not another flybar..LOL (flybar is a bit thicker)...so make sure the one your using as a flybar is thicker b/c the metal pushrod is thinner. As for the blk. plastic straw, it's for the old school FM antenna wire but I am sure you're probably using a 2.4 digital radio. For some reason if your not, the antenna wire is meant to be inserted into the straw and then placed through the little loops on your landing skids.
Good luck.....
|
|
|
|
Post by chitty024 on Feb 10, 2012 10:13:14 GMT -4
Awesome! Thanks guys! I am going to go pick up some mini files and a caliper and get to work...will post some pics later! oh and I did have the flybar switched around lmao! It fits soo much better now! |
|
|
|
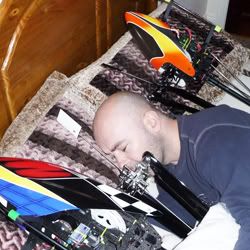
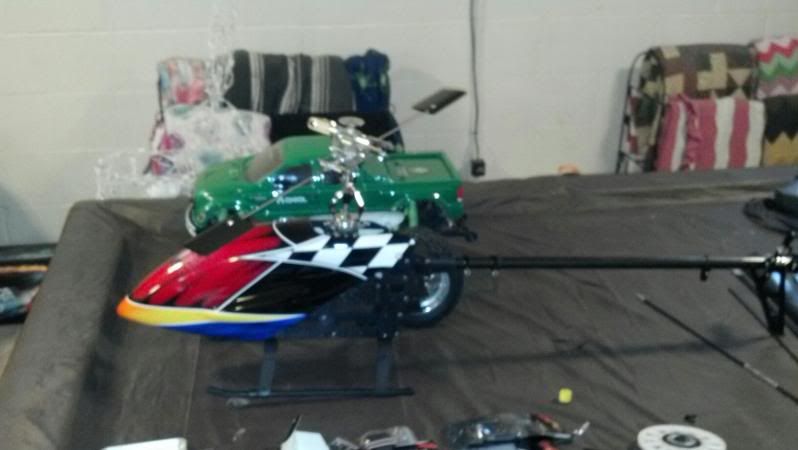
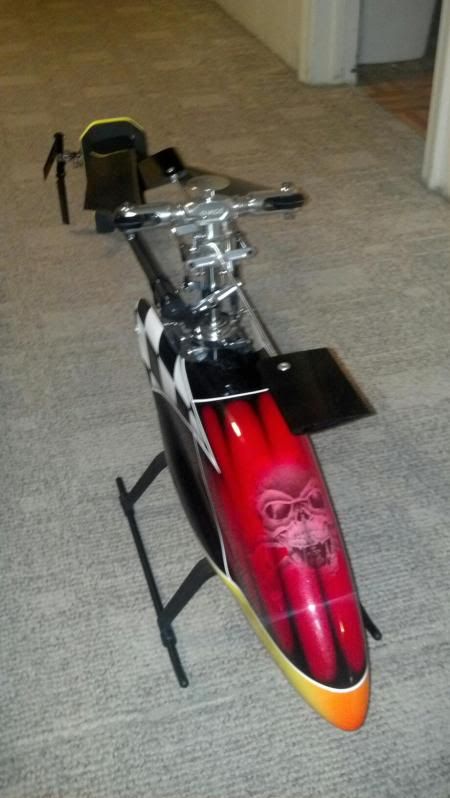
Post by chitty024 on Feb 12, 2012 22:20:25 GMT -4
|
|
|
|
Post by Dr. Evil on Feb 12, 2012 22:30:52 GMT -4
Looking good Chitty!
|
|
Deleted
Deleted Member
Posts: 0
|
Post by Deleted on Feb 12, 2012 22:45:26 GMT -4
+1 Looking good!
|
|
|
|
Post by garrettt04s on Feb 12, 2012 23:06:19 GMT -4
Very nice
|
|
|
|
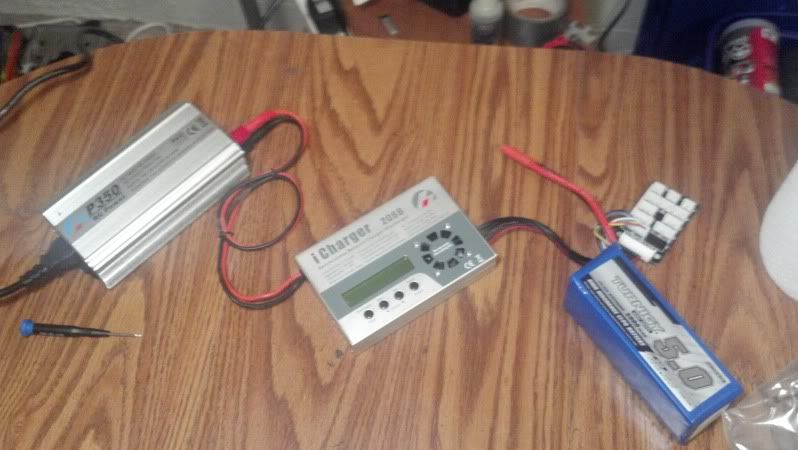
Post by onthedeck on Feb 13, 2012 2:20:10 GMT -4
+1,looking very nice.That's a really good charger/power supply combo also  .. |
|
|
|
Post by chipwich on Feb 13, 2012 17:20:57 GMT -4
Great thread guys, since I will be beginning mine in the next day or two. Spent the weekend gathering assorted tools and setting up a place to build in the basement.
|
|
|
|
Post by chitty024 on Feb 15, 2012 23:53:46 GMT -4
Next set of questions... 1. The manual shows some kind of triangle shaped spacer for the servo that screws in and then you mount the servo to it, all i have are rectangle pieces. 2. Are there directions for mounting all of the electronics and preferred locations anywhere? 3. How tight do I make the main blades and tail blades? Thanks guys! |
|
|
|
Post by Dr. Evil on Feb 16, 2012 2:32:21 GMT -4
Next set of questions... 1. The manual shows some kind of triangle shaped spacer for the servo that screws in and then you mount the servo to it, all i have are rectangle pieces. 2. Are there directions for mounting all of the electronics and preferred locations anywhere? 3. How tight do I make the main blades and tail blades? Thanks guys! 1. The rectangle ones are the ones you use in the Chaos kits. 2. Just follow the Trex 600esp manual and you should be fine. 3. Not so tight that when you hold up the heli on it's side the blade can't fall on its own. |
|
|
|
Post by mattox on Feb 16, 2012 2:52:24 GMT -4
ahhh look at that beauty shine!!!
|
|
|
|
Post by Dr. Evil on Feb 16, 2012 13:26:57 GMT -4
ahhh look at that beauty shine!!! ? |
|


 ..
..
 ? seems like a decent deal for 749. !!!!!