

Post by Chris Reibert on Sept 22, 2014 22:57:15 GMT -4
Invertix 400 Build and Review
Review By Chris Reibert
SPECS
MANUFACTURER: Encore RC
DISTRIBUTOR: www.encorerc.com
FLYING WEIGHT: 635g (Carbon Fiber) 660g (G10 Fiberglass)
WIDTH: 405mm
HEIGHT: 123mm
WEIGHT: 3.30 lbs
Propeller Size: 8” 3D propellers
RADIO: Futaba 14SG
ON-BOARD ELECTRONICS: Factory tuned NanoWii flight controller
MOTOR: Outlaw 2212-1400kv motors (x4)
ESC: Outlaw reverse3D 25Amp Opto ESCs (x4)
BEC: Outlaw 2.5 Amp 5V BEC
BATTERY: Pulse Ultra 3s 2250mAh 45c LiPo
DURATION: 3-4 Minutes (3D Flight)
MINIMAL FLYING AREA: Yard or park
NEEDED TO COMPLETE: 5 Channel 2.4Ghz transmitter, 2200-2600mAh battery and a pre-bound
Spektrum satellite or 5 Channel 2.4Ghz Receiver
PRICE: Receiver Ready $399.99 RTF $649.99
AUTHOR’S OPINION:
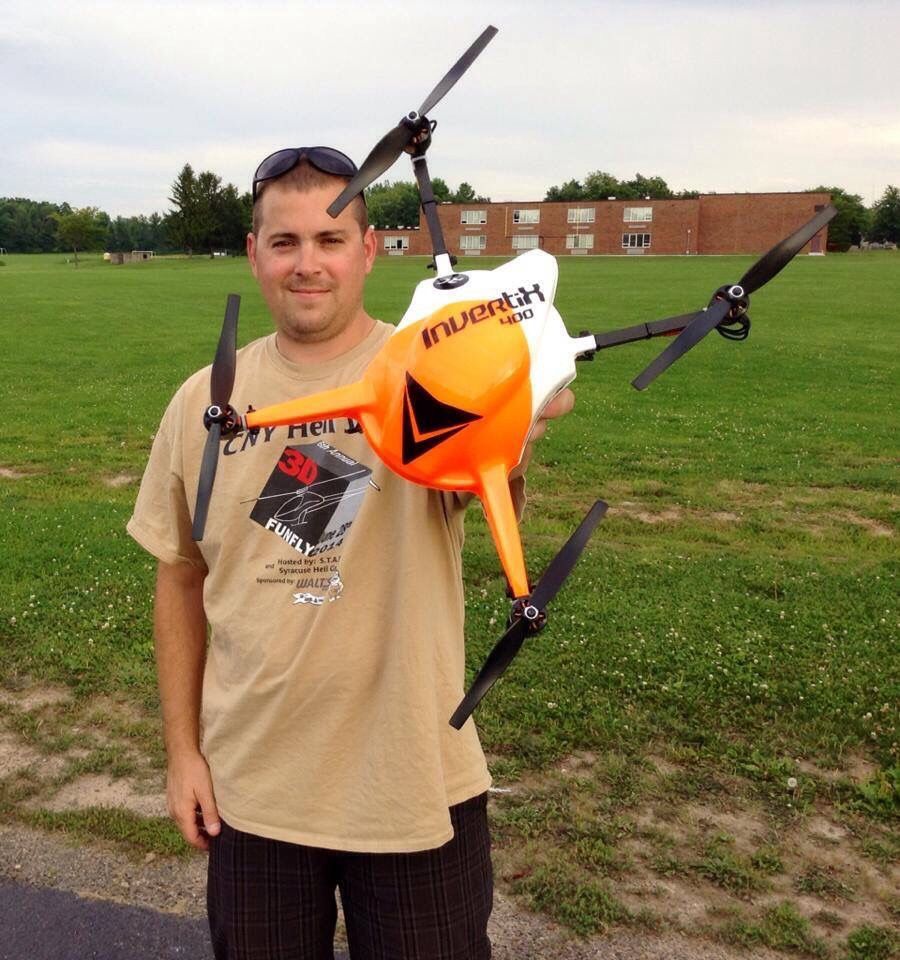
The Invertix 400 is the World's First fully 3D capable fixed-pitch multirotor to come to the commercial market. Others have dabbled in 3D capable quad-copters before but no one has perfected the technology as well as Bobby Watts and his team of R&D engineers. Built and sold right here in the USA the Invertix 400 is a really fun quad-copter that anyone can learn to fly and perform 3D maneuvers with ease. If you have never flown a quad-copter before don't let the Invertix 400 scare you away just because it is designed around a 3D training platform. It is easy to build with just a few basic hand tools and can be built in less than two hours. Once you've mastered the basics of flying the quad you can increase the end points for faster flying speeds and more maneuverability to start performing 3D maneuvers. Coming in at a retail price of just $399.99 for the receiver ready kit it is sure to be a hit for someone looking to try their first 3D quad-copter.
PROS
• Strong carbon fiber main frame (optional)
• ESC's except plug-n-play LED lighting kit
• Flight Ready in as little as 60 minutes
• Ultra low parts count
• Affordable repair costs
• High visibility canopy
• NO SOLDERING REQUIRED
CONS
• Flight time limited to around 3 minutes
• Skids break on hard landings
Flip, roll, tic toc and even piro flip around your backyard with the incredibly fun and nimble Invertix 400 from Encore RC. With its incredibly low parts count the Invertix 400 gets you flying in as little as an hour. At the center of the 3D quad-copter is the NanoWii flight controller that is preprogrammed to give you the perfect balance of stability for any pilot’s skill level. It's unbelievably durable too so you can fly aggressively without worrying about costly repairs if you are just learning to fly 3D.
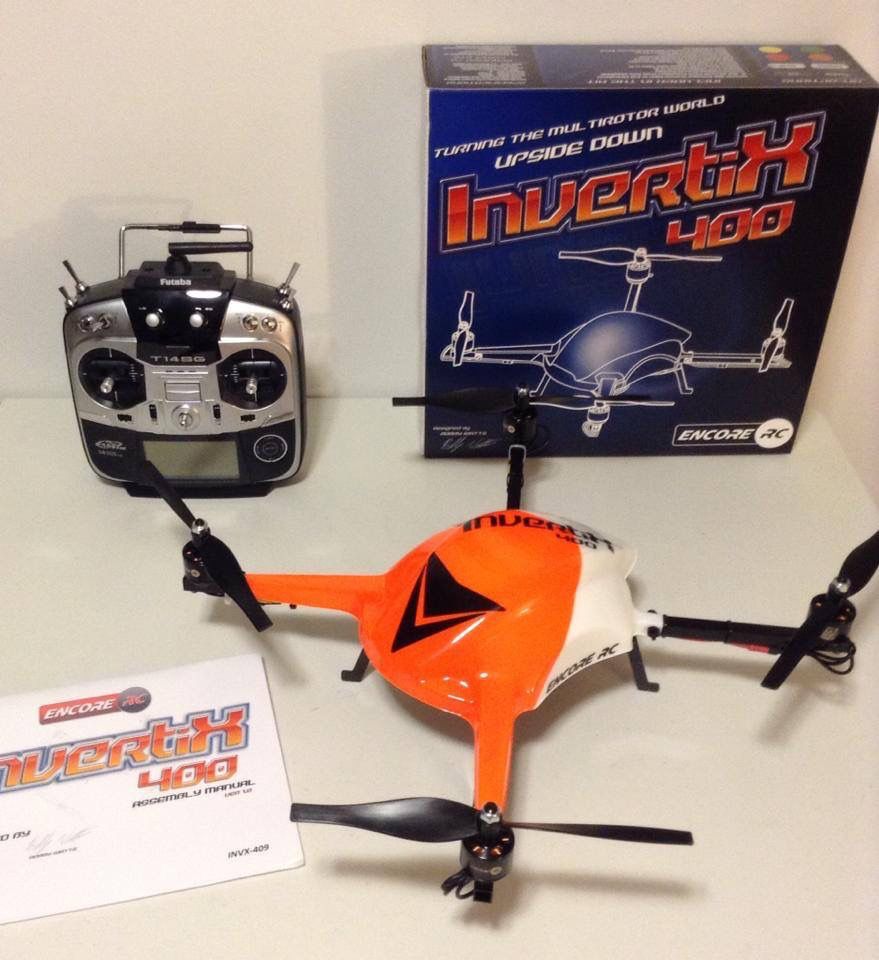
OPENING THE BOX
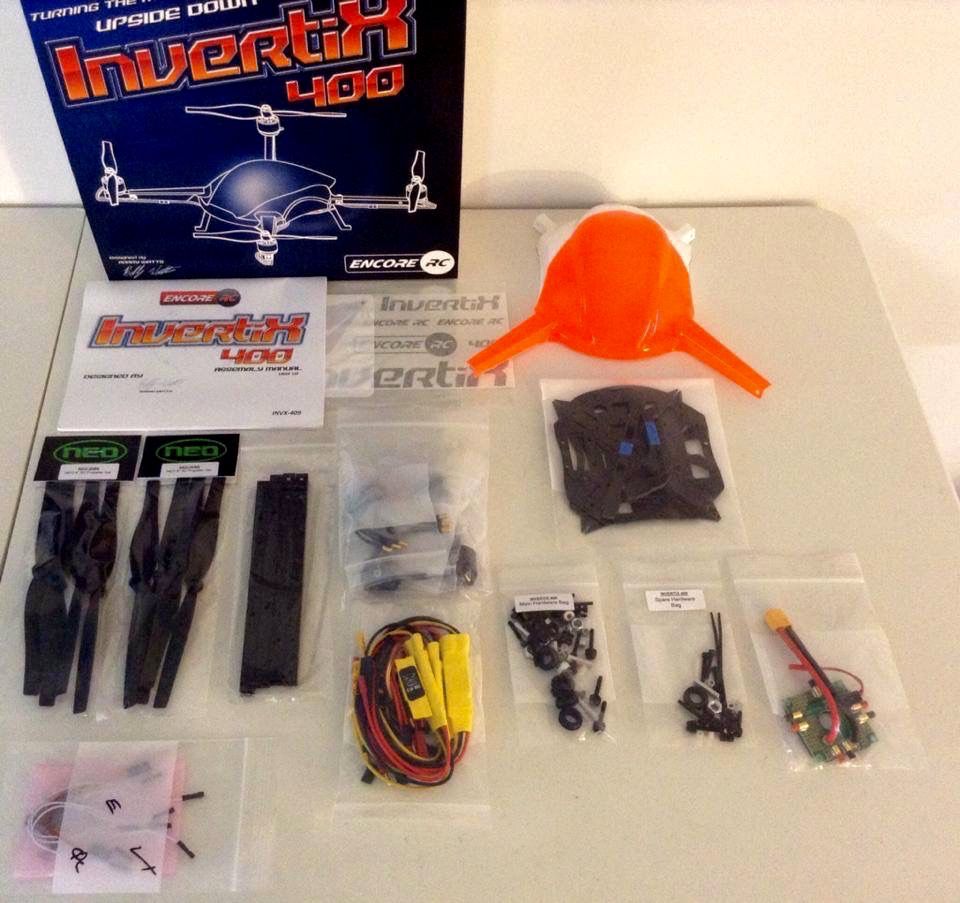
When you open the box you find the pre-painted canopy in foam wrap to protect it from getting damaged during the shipping process. Next you will find the very informative and well laid out 34 page full color manual and a high quality vinyl decal set. Lift up the cardboard divider and you will find everything you need to complete your new build. Each component is individually wrapped. The first bag I pulled out was all the frame parts which included the top frame, bottom frame, battery plate, four frame braces, four landing gear skids and the NanoWii frame protector plate which are available in both carbon fiber or G10 material. The next bag included the four aluminum arms that are precut and predrilled ready to be installed into the frame. The power distribution board, Outlaw BEC, four Outlaw motors, four Outlaw ESC's, and hardware bags are also packed in individual bags. Encore RC knows sometimes small hardware is overlooked or lost in manufacturing so they included a bag full of misc build hardware. The Invertix 400 also comes with two sets of NEO 8" 3D propellers just in case you happen to break a set during testing; Encore RCcovers your first crash.
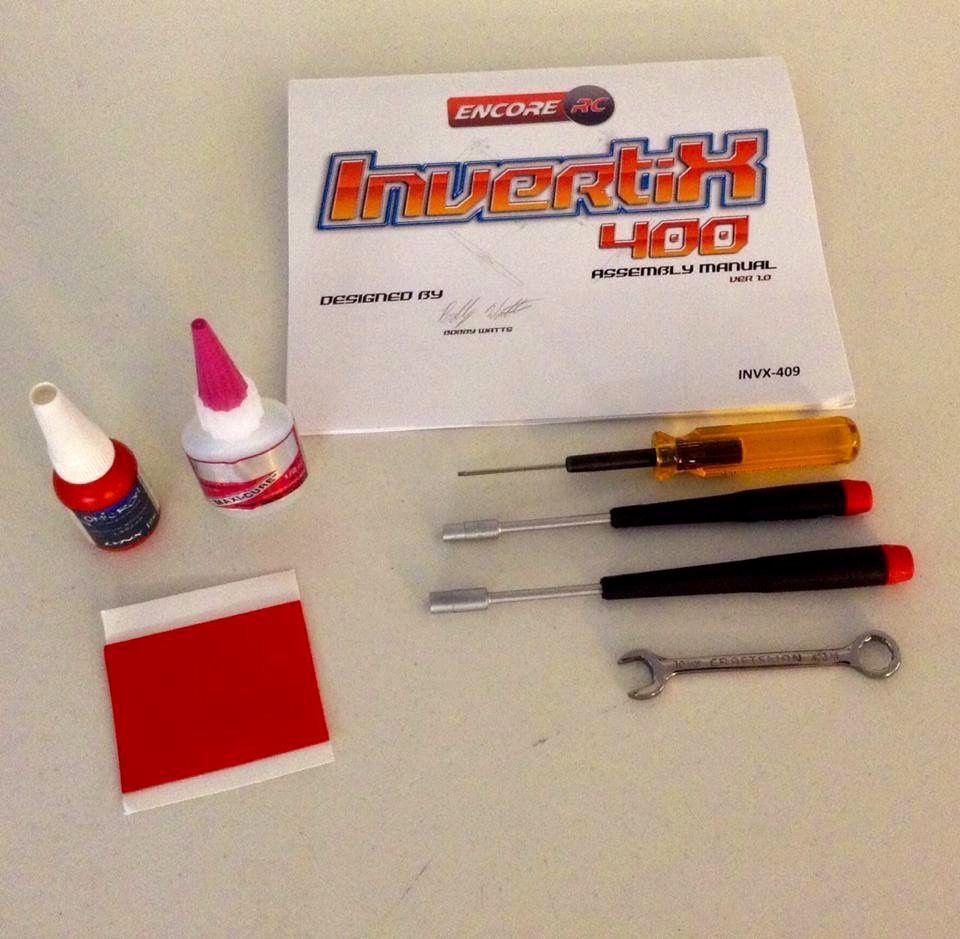
TOOLS NEEDED TO COMPLETE THE BUILD
The entire build can be completed with a 2.5mm hex driver and a 4.5mm, 5.5mm and 10mm nut driver. You will also need some blue Loctite, medium CA and a piece of double sided tape to mount your receiver.
THE AIRFRAME BUILD
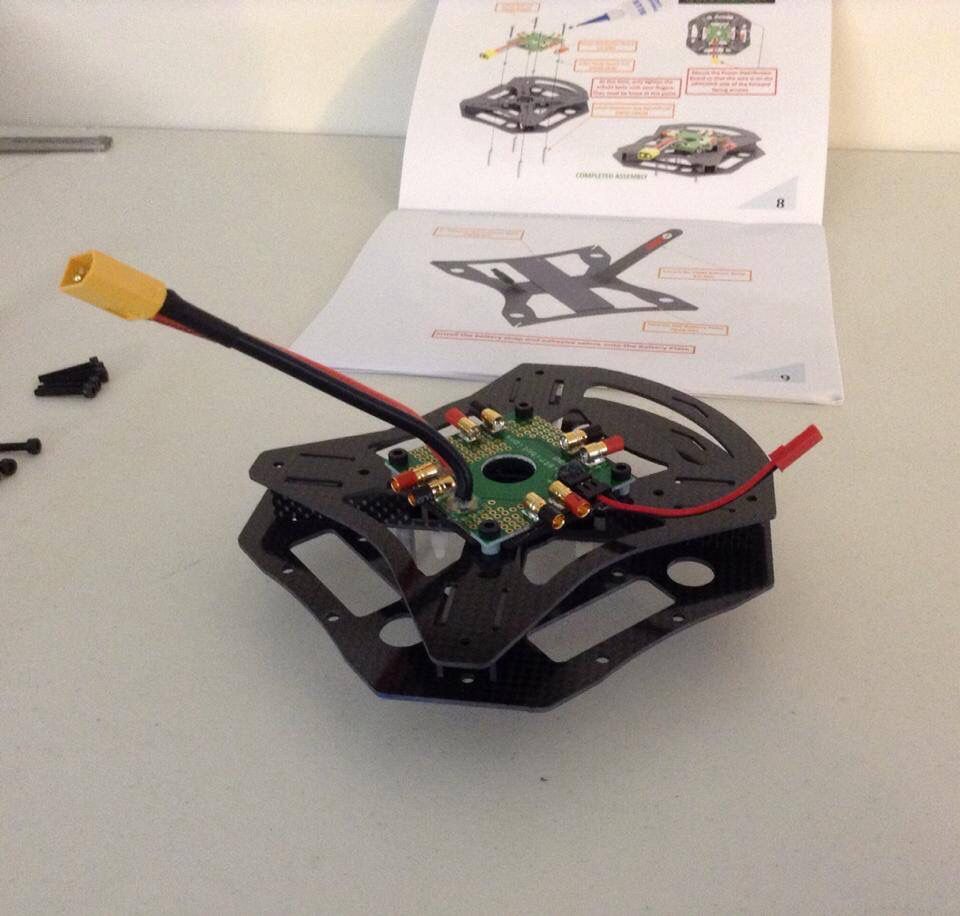
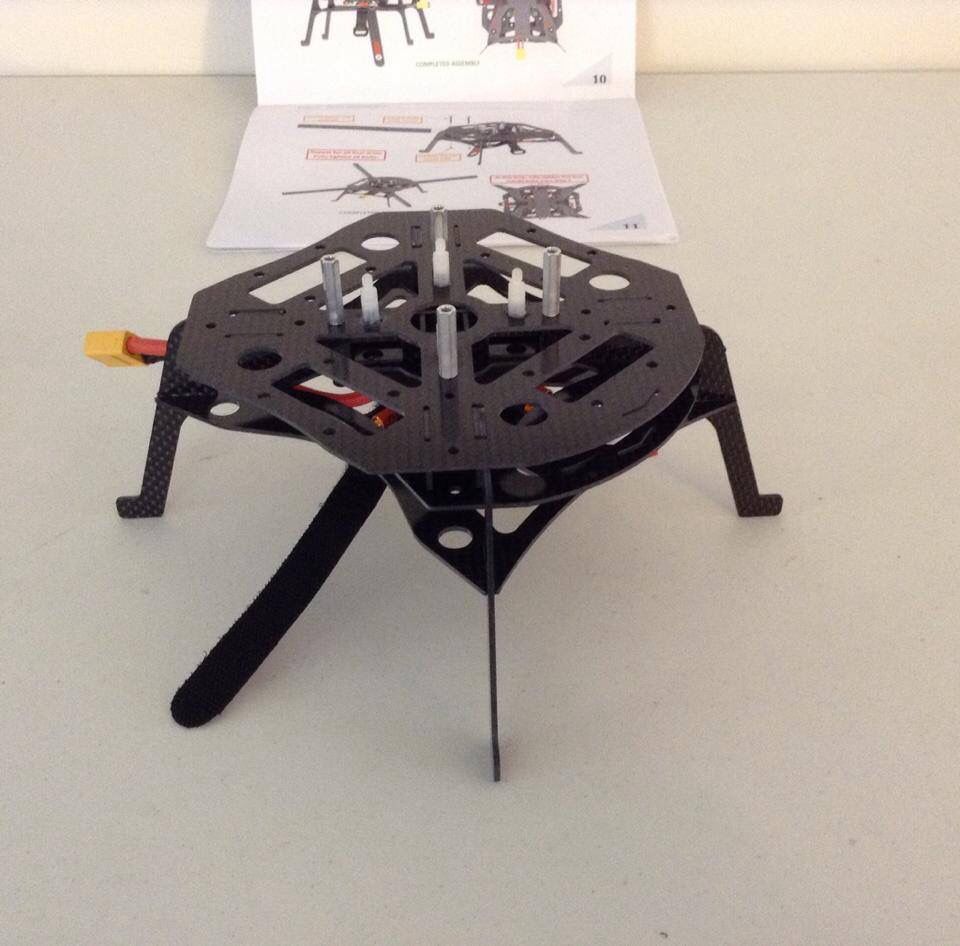
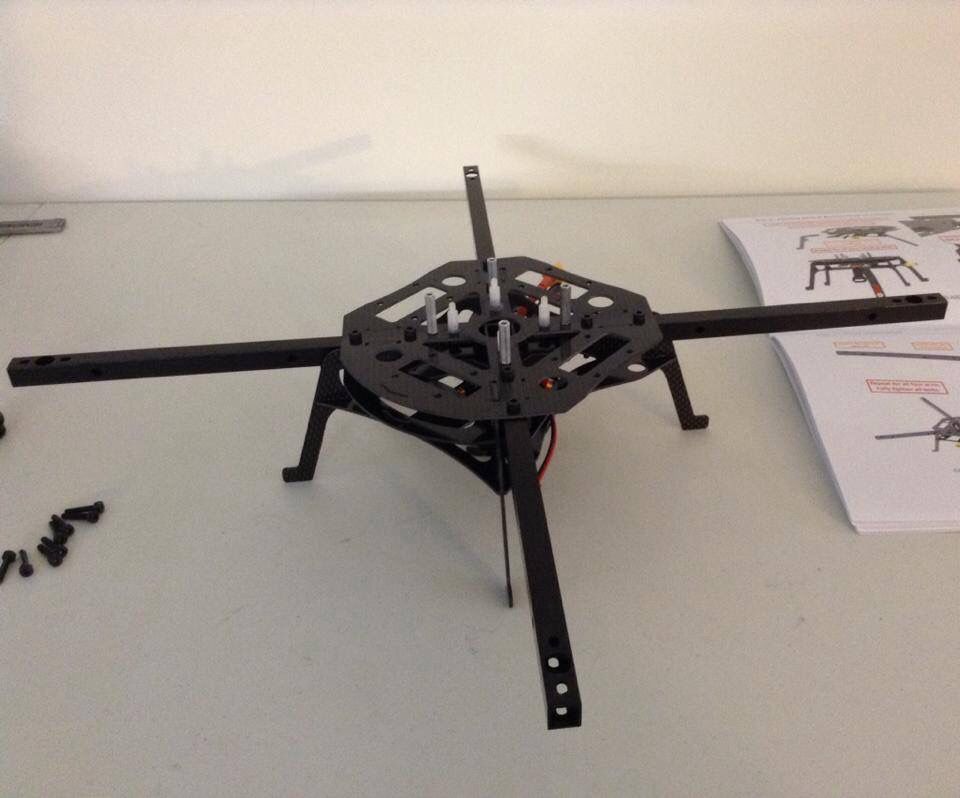
The manual was very clear to understand and well laid out with the very important steps highlighted in red font. You can tell the folks at Encore RC spent a lot of time perfecting it. The build begins by joining together the four frame support brackets into the shape of a cross. My parts fit together perfectly without any sanding. Bobby states in his build video that some carbon fiber parts may fit rather snug together and might need to be tapped together on a flat surface. Next I screwed on the plastic hex frame standoffs that house the NanoWii onto the top frame plate and joined together the top and bottom frame plates with the frame braces secured in between. The power distribution board gets mounted to the bottom frame plate with four m3x20 bolts that go through both frames to the four aluminum hex nut posts above which will give the NanoWii protector plate a place to mount onto. I just finger tightened the nuts at this point because the next step was to install the battery plate and the four landing skids and you need some vertical play between the frames to insert the skids. This took a little bit of effort as you have to insert the landing skids into the frames at the same time you interlock the skids into the battery plate. Once the skids and frames are lined up and installed correctly you can add loctite and tighten the four screws that hold the frames together. The four aluminum motor arms securely mount inside the frame with two m3x20 bolts and m3 nyloc nuts. This step is what really gives the airframe its rigidity. The last step before we move onto the electronics portion of the build is installing the four rubber grommets into the frame holes where all of the electronic wires will pass through. This completes the Invertix 400 airframe build.
Frame parts
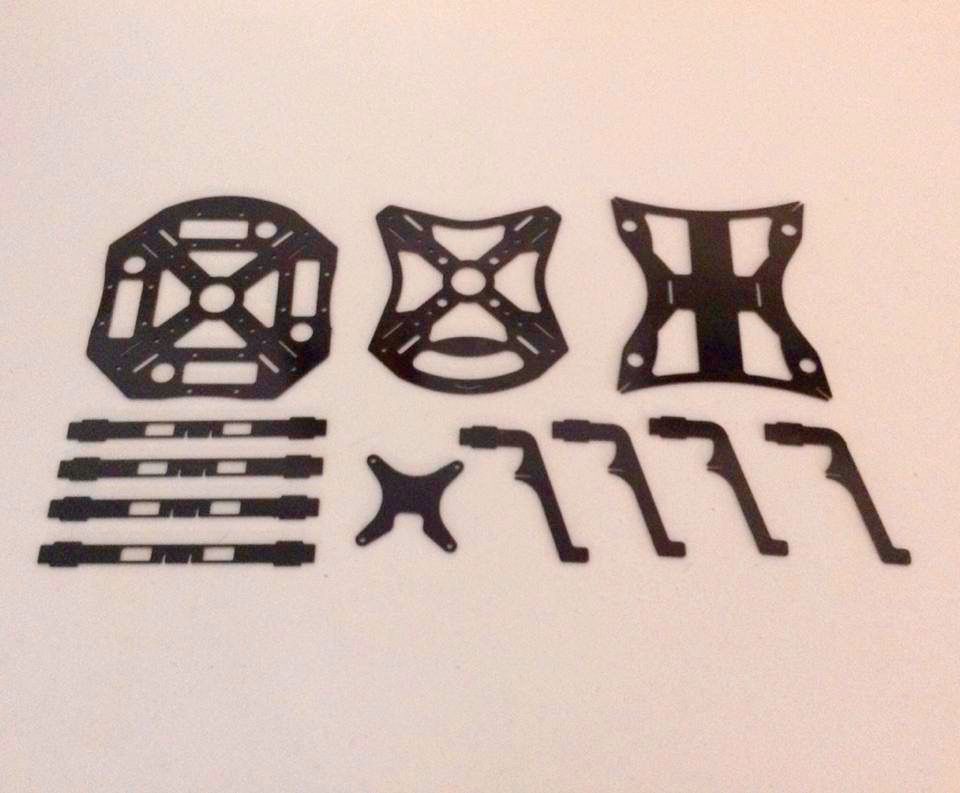
Frame support brackets

Power distribution board
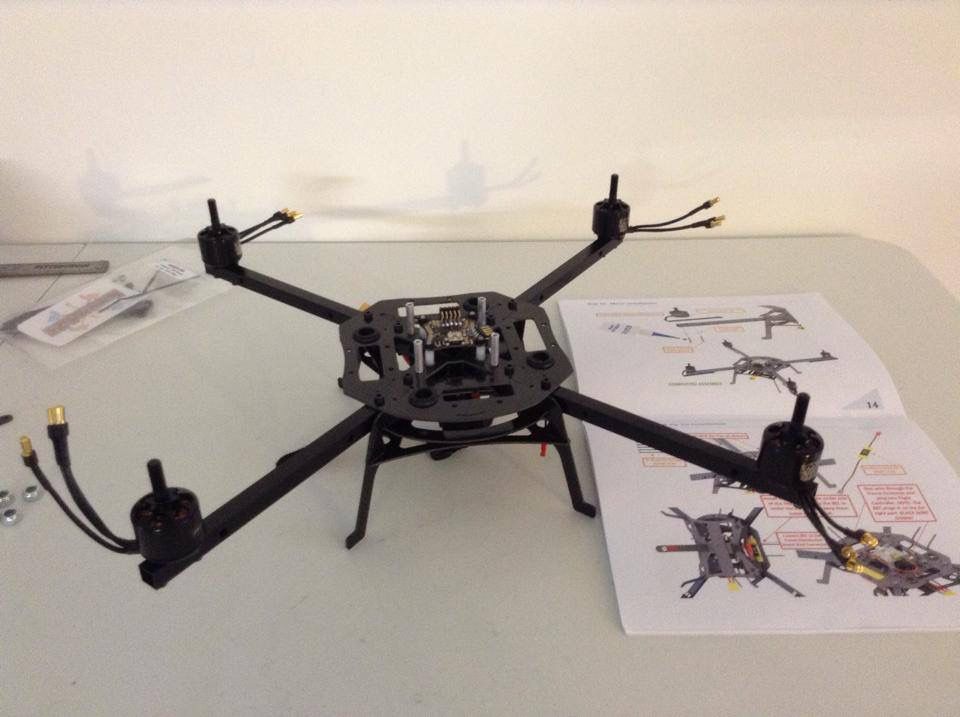
Skids and battery tray installed
Four motor arms installed
ELECTRONICS INSTALLATION
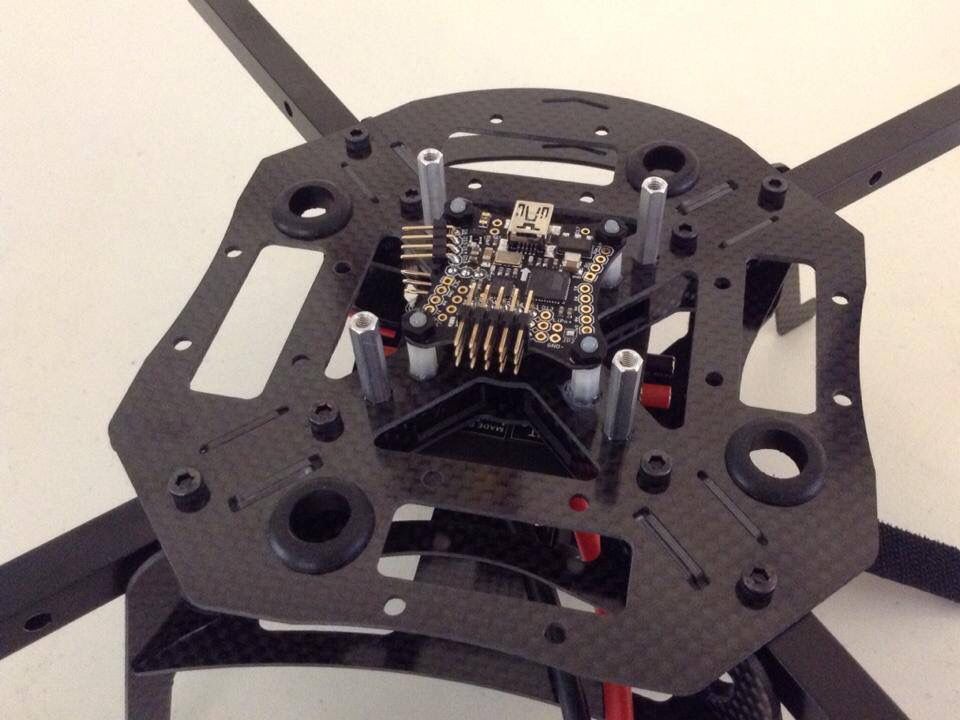
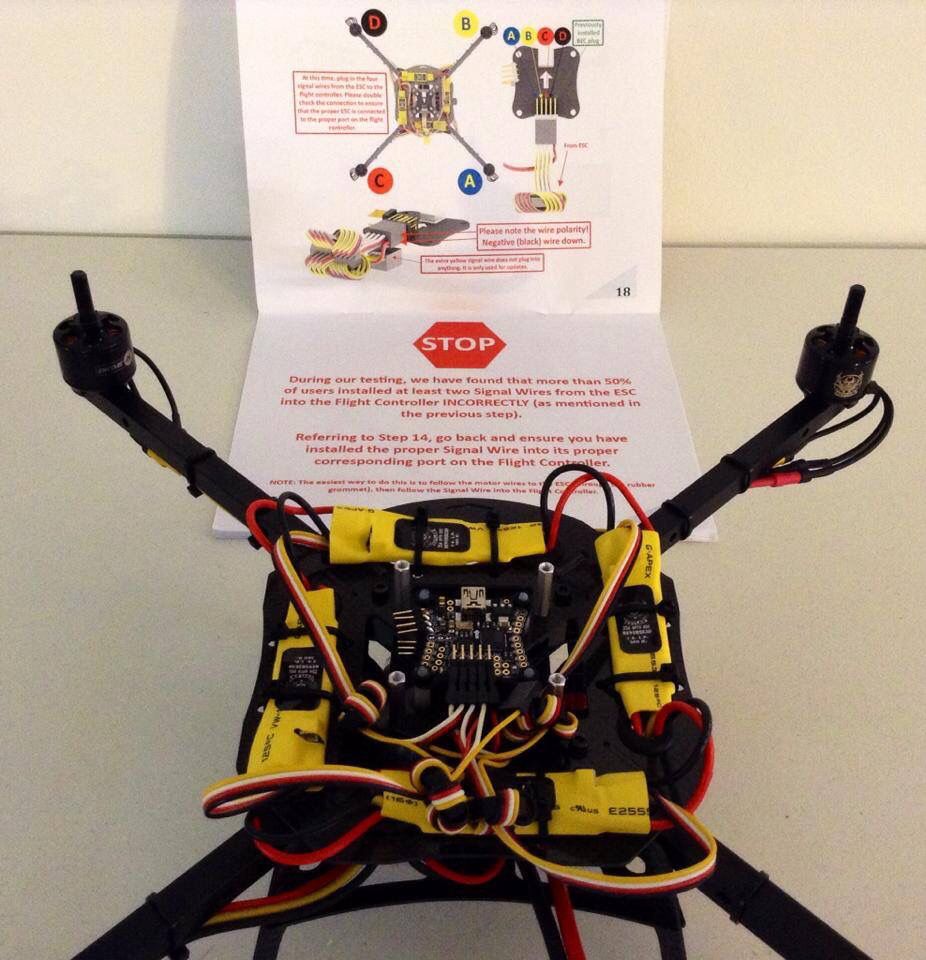
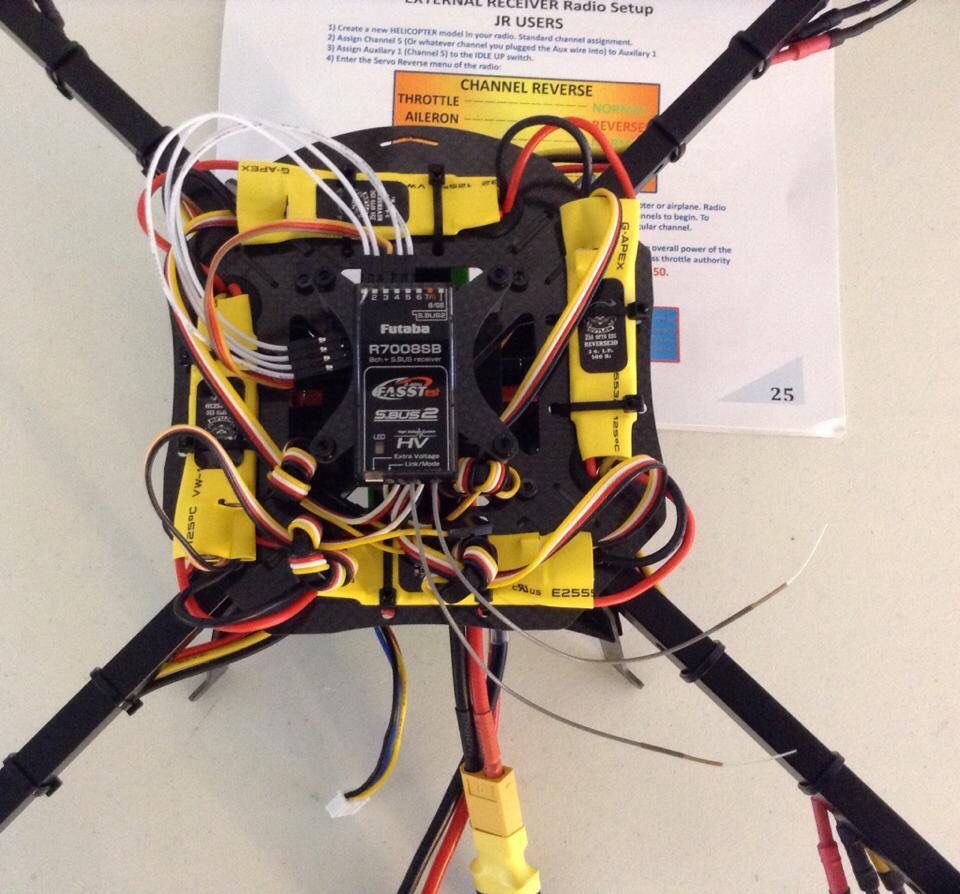
The first step in the electronics portion is mounting the NanoWii control board onto the plastic mounting posts and securing the board with four m3 plastic nuts and a drop of CA to insure the nuts won’t come loose over time. Don’t forget to install the four rubber o-rings onto the hex posts before installing the NanoWii which will help with any unwanted vibrations. The four Outlaw 2212-1400kv motors mount onto the arms with two m3x14 bolts and washers. I mounted the motors with all my wires facing in a clockwise direction and also applied loctite for addedsafety. Before I mounted the BEC and four ESCs I installed the eight zip ties through the pre-drilled frame holes. The Outlaw 2.5 Amp 5V BEC mounts up under the top frame and plugs into the power distribution board and the signal wire runs through the frame grommet, and then plugs into the far right port on the NanoWii. The four Outlaw reverse3D 25Amp Opto ESCs install onto the top frame and get secured down with the zip ties. All four sets of power wires from the ESCs run through the grommetsand plug into the power distribution board on the lower frame plate as well as connecting the wires to the four motors. Use the supplied zip ties to secure the motor and ESC wires under each frame arm. The next step is extremely crucial to a successful first flight. Please read the manual very close and carefully trace back each ESC signal wire one at a time and plug the appropriate ESC signal wire into the correct slot on the NanoWii controller,negative black wire down. The extra yellow signal wires do not plug into anything as they are there for any possible future updates Encore RC may release. Once you have checked and rechecked all ESC wires are plugged into the correct ports on the flight controller, you can install the flight controller cover plate with four m3x6 bolts using loctite. The last step in the electronics build is to install either your pre-bound Spektrum receiver or an external receiver onto the mounting platform and plug it into the NanoWii. This completes the electronics portion of the Invertix 400 build and we are ready to move onto setup.
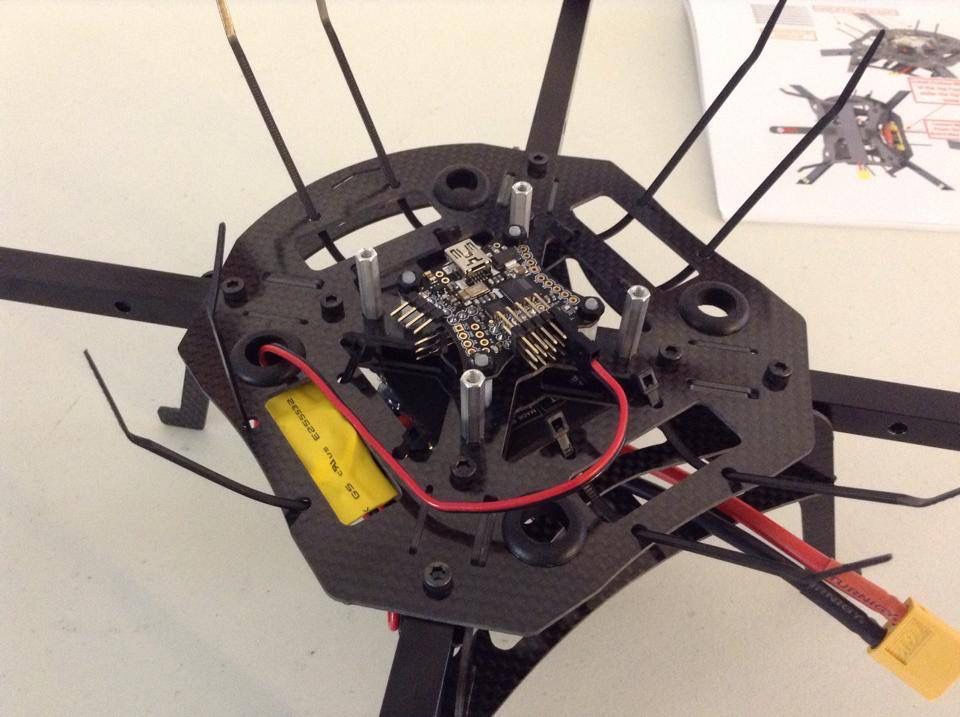
NanoWii installed
Outlaw 2212-1400kv motors
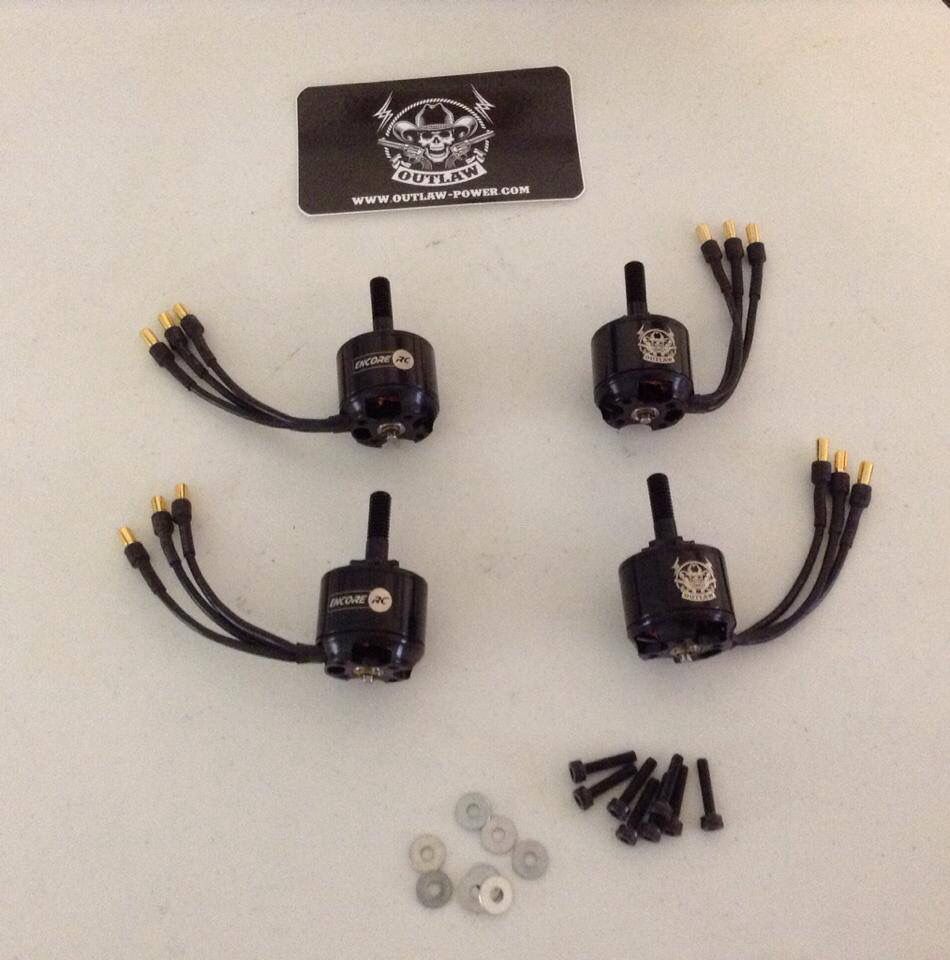
Motors bolted up
BEC and zipped ties installed awaiting the four Outlaw ESCs
ESCs secured
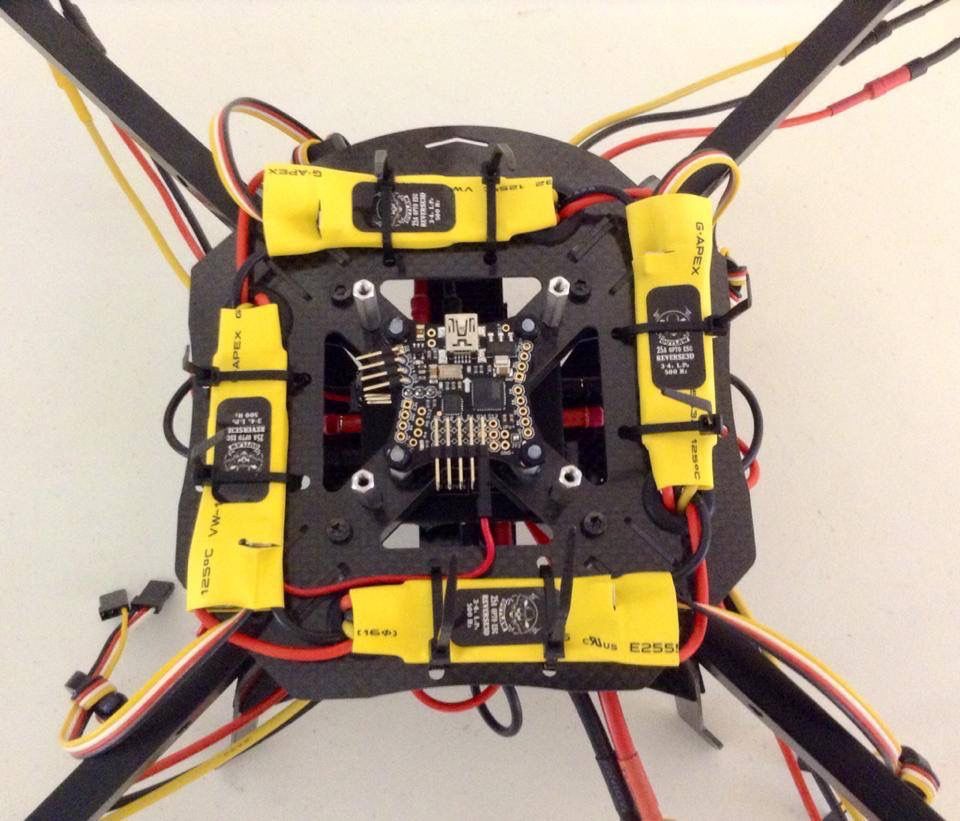
*VERY IMPORTANT STEP* Make sure all ESC wires correspond to appropriate locations on the NanoWii
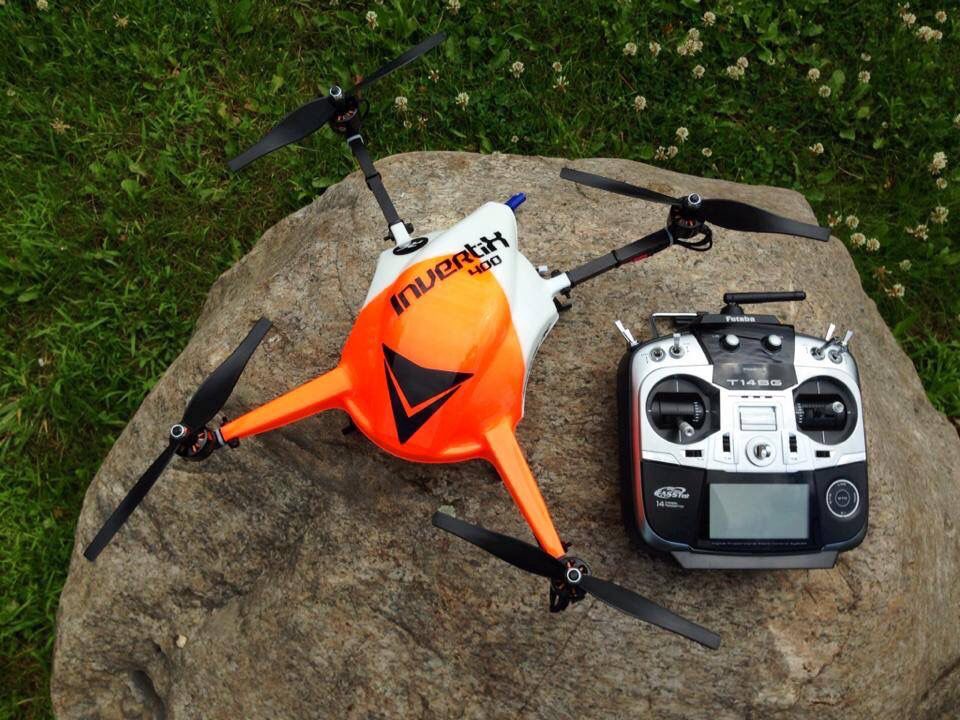
SETUP
The brain behind the Invertix 400 is the NanoWii flight controller which comes preprogrammed for either a Spektrum satellite or external receiver. For my build I used a Futaba 14SG and an external 7 channel receiver, though just a 5 channel receiver is needed. I created a new helicopter model and selected H-1 for the swash plate setting. I assigned my channel 5 to auxiliary 1 which is activated by my idle up switch. Make sure you follow themanual and reverse the appropriate channels stated in the manual for the radio brand you are using. The NanoWii flight controller works like a traditional airplane receiver setup so you can use the digital transmitter trims to trim out the model. The NanoWii needs to see channel 5auxiliary set to full negative and positive end points to activate the system. Use the default 100% end points for aileron, elevator and rudder channels for a beginner setup. You can increase the end points later for faster flip, roll and piro rates if desired. Throttle end points should be set to 125% to start off with as the end points of the throttle channel control the overall power of the model. To make sure appropriate motors were spinning in the correct direction I added a piece of tape onto each motor shaft and quickly powered up the Invertix 400 and watched the direction the motors spun. Two of my motors had to be reversed which was done by swapping two of the three motor wires. To power up the motors on the Invertix 400 you have to flip into flight mode. I use my idle up switch to activate the NanoWii controller. Normal mode and idle up 1 mode do not do anything and act as throttle hold. The Invertix will not activate until you flip into idle up 2. You want to make sure your throttle stick is at mid stickaround 55-60% while the motors start their slow start process. The Outlaw ESCs are preprogrammed with a soft start feature but if you have the throttle stick above or below half stick after the slow start finishes the modelwill follow that command and accelerate pretty quickly. Once you are done flying the model just land and flip out of the idle 2 and the motors will shut off and disarm the system.
External receiver bond and hooked up
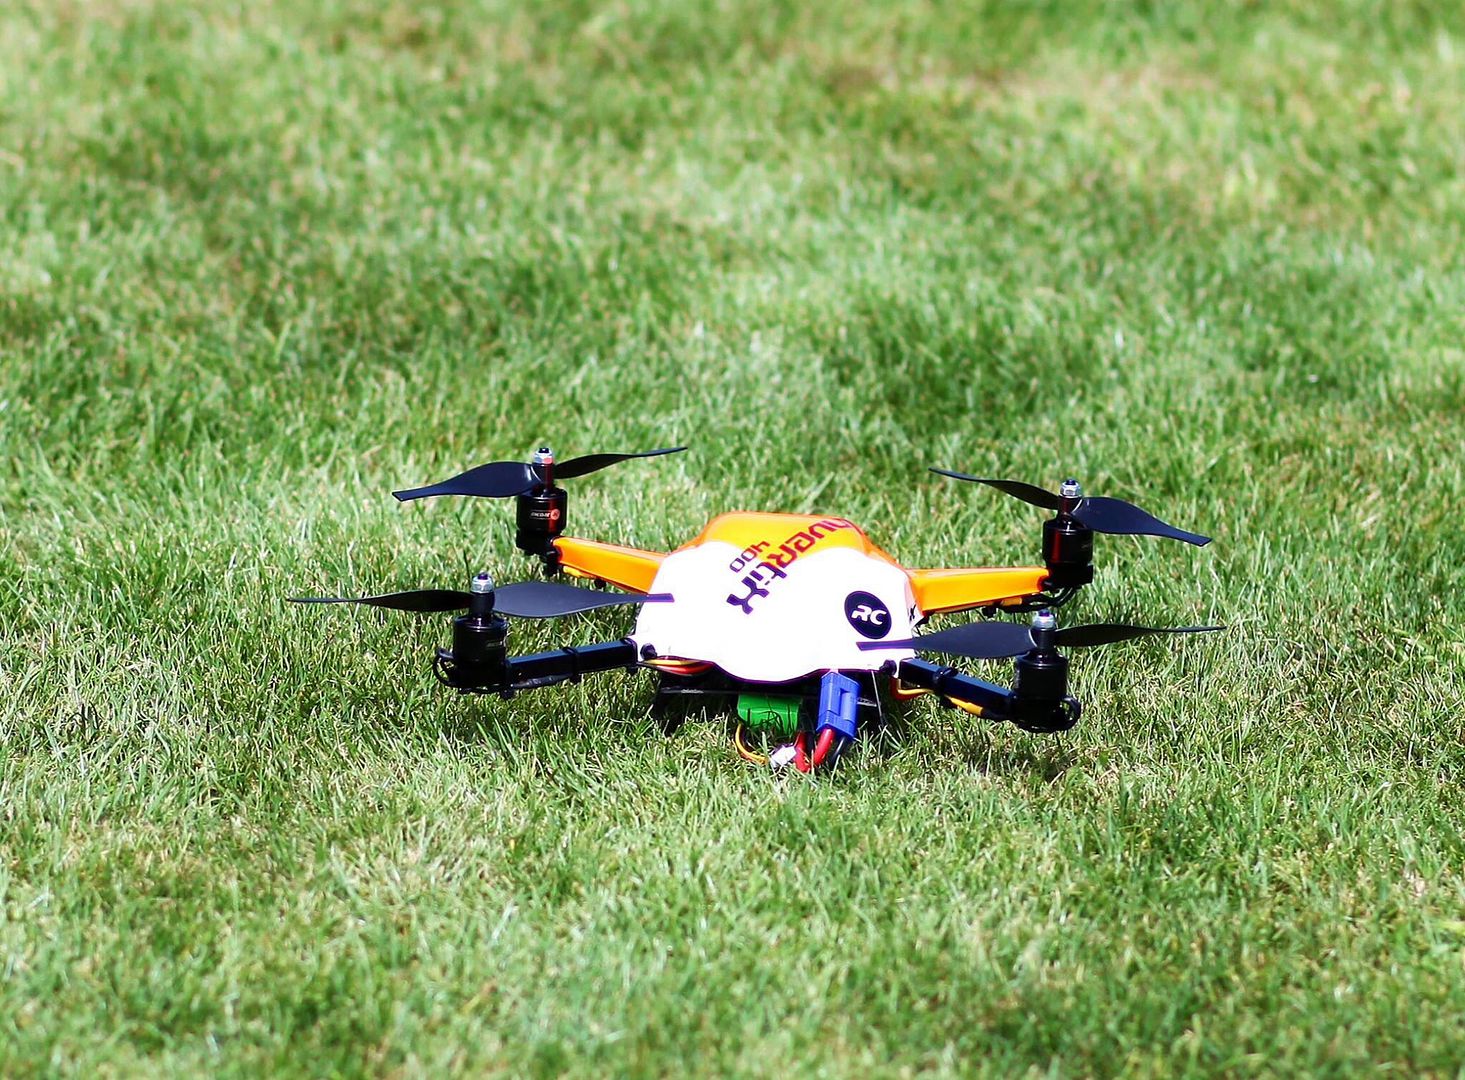
IN THE AIR
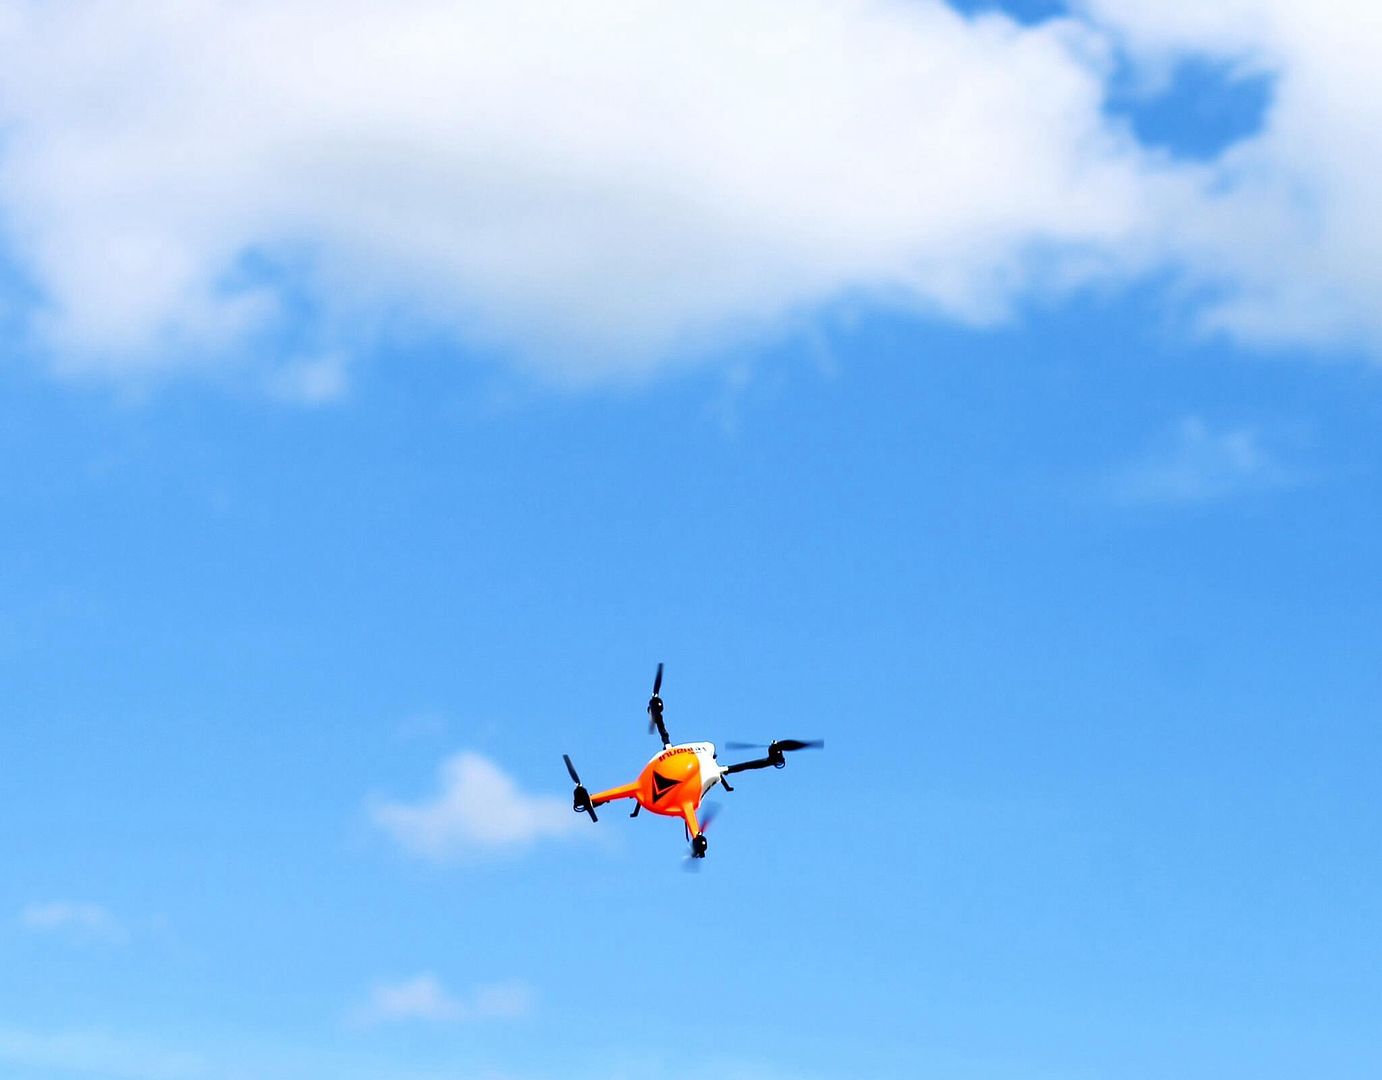
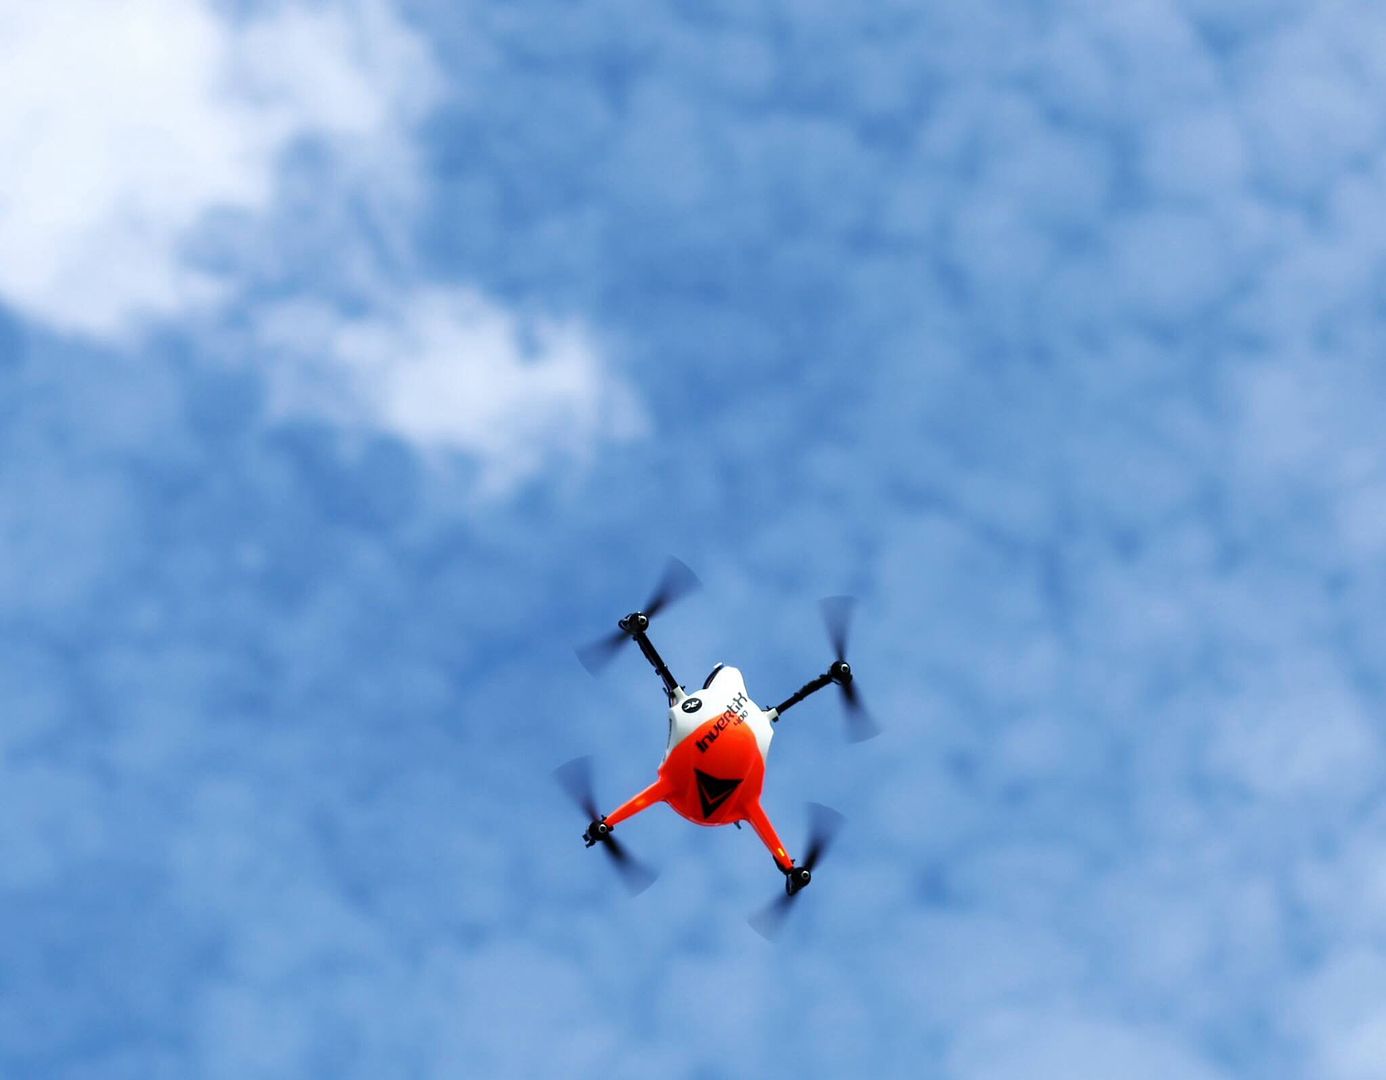
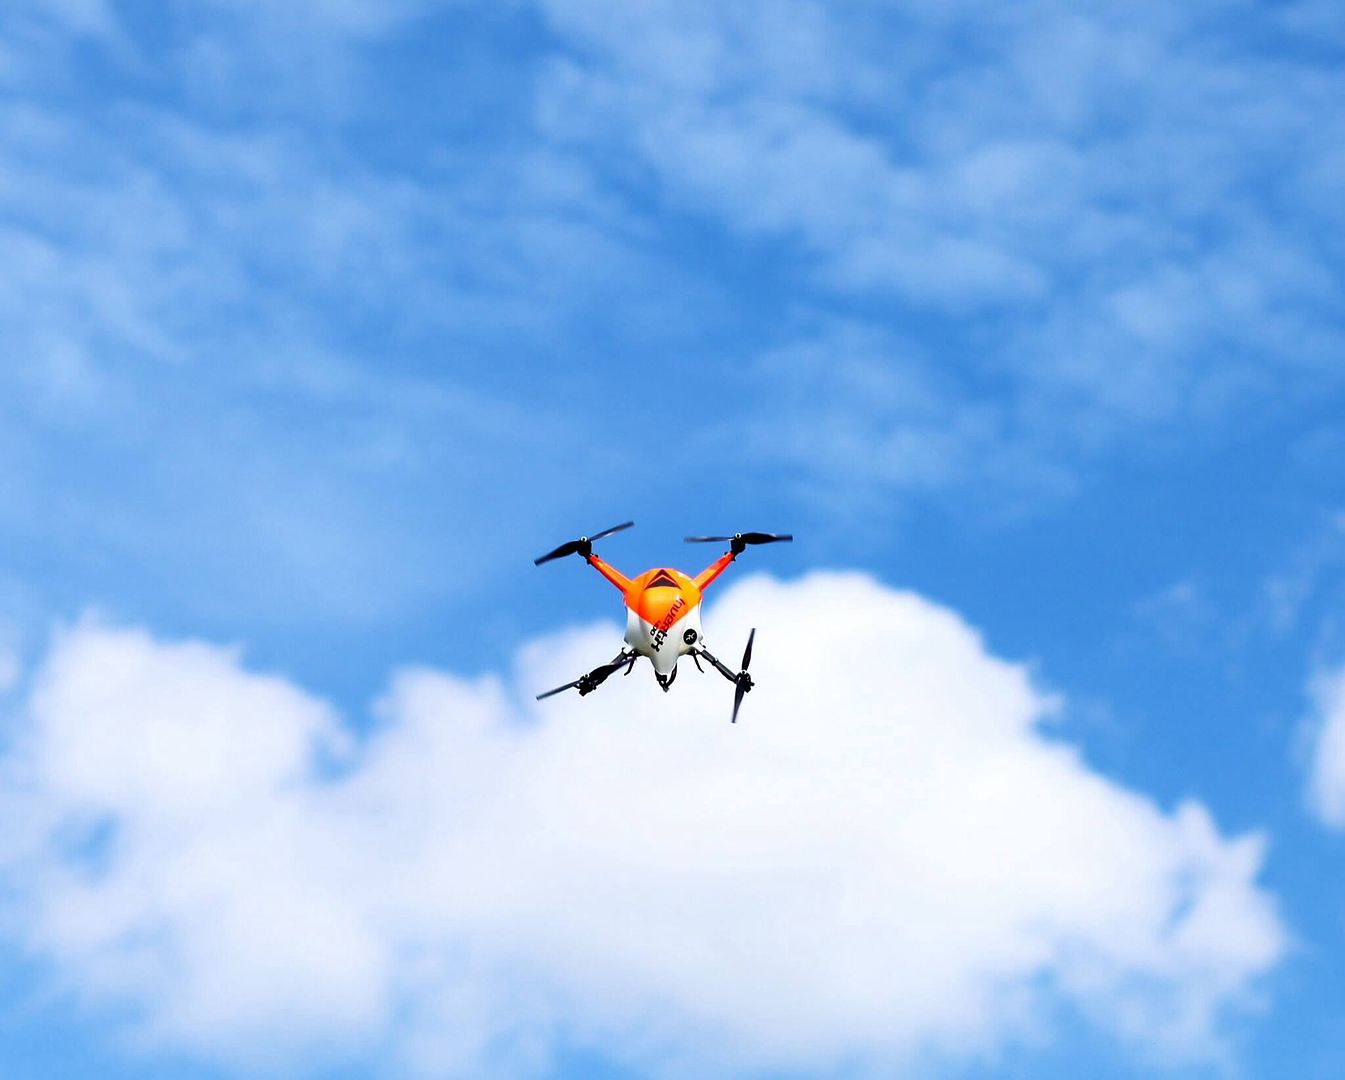
The Invertix has the look of a flying frog floating through the air with its long aluminum arms and 8" propellers. It hovers very smooth and stable. I was amazed how fast the ESCs were capable of reversing the direction of the brushless motors in flight. Encore RC has programmed the ESCs and motors for extremely quick direction changes with continued reliability flight after flight. It did not take me long to get used to how the Invertix flies however I recommend putting a few battery packs through the machine before attempting 3D maneuvers. I am a pretty competent 3D pilot yet flipping and rolling the Invertix for the first few times was a lot different than standard 3D helicopters. I bounced the Invertix off the ground pretty hard my first flip and broke one prop and a few landing skids. The obvious advantage of the fixed pitch propeller approach is simplicity but these results in the collective feeling almost squishy. You will want to be one step ahead on the collective during 3D maneuvers. The ESCs operate very fast but there is still some latency as the motors change rpm or direction in response to control inputs. I’ve got to tell you though once you’ve mastered how the Invertix flies its list of maneuvers in long. Nothing is cooler than hearing the motors stop and reverse as the Invertix piro flips across the sky.
Flight times averaged around 3-4 minutes depending on your flying style and lipos you choose to use. I fly my Invertix with Pulse Ultra 2250mAh 45c lipos. I set my timer to three minutes which usually brings my flight packs down with 35% battery life remaining after hard 3D flights. If I'm just sport flying I could get around a four minute flight. The manual states the Invertix can accommodate up to a 2700mAh pack which would further your average flight time.
Final Touches
The Invertix 400 kits come with a pre-painted high visibility canopy that provides unparalleled visibility and orientation during all flying maneuvers. Each canopy comes with a set of quality vinyl decals and four canopy nut and bolts. Once you install the canopy you really don’t need to get back to the electronics again. Encore RC also offer LED lighting strips sold separately that come pre-wired and plug directly into a port on the Outlaw ESCs. This is a fun and colorful add-on if you plan to night fly.

PRO TIPS
- Sand down any edges on the carbon fiber frame where electronics wires may contact
- Double check blade and motor direction before first initial test flight
- Move the throttle stick set to half stick on spool up
THE LAST WORD
The Invertix 400 is the ultimate machine to practice and enjoy 3D flying without having to worry about costly crash mistakes. It has an ultra low parts count making it simple and affordable to repair with the average crash costing around $20-$30. With its incredibly robust and simple design even a beginner can get it flying in hours.Bobby's team has focused much of their time on the R&D to perfect the Outlaw reverse3D ESCs and motors. I was impressed from the second I put it into its first hover inmy front yard at how stable it was having no built-in stability features. I really enjoy flying the Invertix around my yard and turning heads at the local flying fields. I would highly recommend it to anybody looking to make the transition from a coaxial helicopter to something more maneuverable with the flight characteristics of a collective pitch 3D helicopter. It is very fast andresponsive when you want it, but can be dialed down by just decreasing your end points for a great docile 3D trainer. You could even mount a Mobius action camera on the bottom for some cool aerial video. Encore RC has also released an update card to reprogram the four stock ESCs to allow 4s packs. You can still fly it on 3s or 4s packs after the update. The Invertix 400 truly is the next step in affordable 3D quad-copters. Enjoy and see you at the field.
CONTACT
ENCORERC, encorerc.com, support@encorerc.com
Videos:
Build
6 Invertix Demo
Invertix pylon race
Review By Chris Reibert
SPECS
MANUFACTURER: Encore RC
DISTRIBUTOR: www.encorerc.com
FLYING WEIGHT: 635g (Carbon Fiber) 660g (G10 Fiberglass)
WIDTH: 405mm
HEIGHT: 123mm
WEIGHT: 3.30 lbs
Propeller Size: 8” 3D propellers
RADIO: Futaba 14SG
ON-BOARD ELECTRONICS: Factory tuned NanoWii flight controller
MOTOR: Outlaw 2212-1400kv motors (x4)
ESC: Outlaw reverse3D 25Amp Opto ESCs (x4)
BEC: Outlaw 2.5 Amp 5V BEC
BATTERY: Pulse Ultra 3s 2250mAh 45c LiPo
DURATION: 3-4 Minutes (3D Flight)
MINIMAL FLYING AREA: Yard or park
NEEDED TO COMPLETE: 5 Channel 2.4Ghz transmitter, 2200-2600mAh battery and a pre-bound
Spektrum satellite or 5 Channel 2.4Ghz Receiver
PRICE: Receiver Ready $399.99 RTF $649.99
AUTHOR’S OPINION:
The Invertix 400 is the World's First fully 3D capable fixed-pitch multirotor to come to the commercial market. Others have dabbled in 3D capable quad-copters before but no one has perfected the technology as well as Bobby Watts and his team of R&D engineers. Built and sold right here in the USA the Invertix 400 is a really fun quad-copter that anyone can learn to fly and perform 3D maneuvers with ease. If you have never flown a quad-copter before don't let the Invertix 400 scare you away just because it is designed around a 3D training platform. It is easy to build with just a few basic hand tools and can be built in less than two hours. Once you've mastered the basics of flying the quad you can increase the end points for faster flying speeds and more maneuverability to start performing 3D maneuvers. Coming in at a retail price of just $399.99 for the receiver ready kit it is sure to be a hit for someone looking to try their first 3D quad-copter.
PROS
• Strong carbon fiber main frame (optional)
• ESC's except plug-n-play LED lighting kit
• Flight Ready in as little as 60 minutes
• Ultra low parts count
• Affordable repair costs
• High visibility canopy
• NO SOLDERING REQUIRED
CONS
• Flight time limited to around 3 minutes
• Skids break on hard landings
Flip, roll, tic toc and even piro flip around your backyard with the incredibly fun and nimble Invertix 400 from Encore RC. With its incredibly low parts count the Invertix 400 gets you flying in as little as an hour. At the center of the 3D quad-copter is the NanoWii flight controller that is preprogrammed to give you the perfect balance of stability for any pilot’s skill level. It's unbelievably durable too so you can fly aggressively without worrying about costly repairs if you are just learning to fly 3D.
OPENING THE BOX
When you open the box you find the pre-painted canopy in foam wrap to protect it from getting damaged during the shipping process. Next you will find the very informative and well laid out 34 page full color manual and a high quality vinyl decal set. Lift up the cardboard divider and you will find everything you need to complete your new build. Each component is individually wrapped. The first bag I pulled out was all the frame parts which included the top frame, bottom frame, battery plate, four frame braces, four landing gear skids and the NanoWii frame protector plate which are available in both carbon fiber or G10 material. The next bag included the four aluminum arms that are precut and predrilled ready to be installed into the frame. The power distribution board, Outlaw BEC, four Outlaw motors, four Outlaw ESC's, and hardware bags are also packed in individual bags. Encore RC knows sometimes small hardware is overlooked or lost in manufacturing so they included a bag full of misc build hardware. The Invertix 400 also comes with two sets of NEO 8" 3D propellers just in case you happen to break a set during testing; Encore RCcovers your first crash.
TOOLS NEEDED TO COMPLETE THE BUILD
The entire build can be completed with a 2.5mm hex driver and a 4.5mm, 5.5mm and 10mm nut driver. You will also need some blue Loctite, medium CA and a piece of double sided tape to mount your receiver.
THE AIRFRAME BUILD
The manual was very clear to understand and well laid out with the very important steps highlighted in red font. You can tell the folks at Encore RC spent a lot of time perfecting it. The build begins by joining together the four frame support brackets into the shape of a cross. My parts fit together perfectly without any sanding. Bobby states in his build video that some carbon fiber parts may fit rather snug together and might need to be tapped together on a flat surface. Next I screwed on the plastic hex frame standoffs that house the NanoWii onto the top frame plate and joined together the top and bottom frame plates with the frame braces secured in between. The power distribution board gets mounted to the bottom frame plate with four m3x20 bolts that go through both frames to the four aluminum hex nut posts above which will give the NanoWii protector plate a place to mount onto. I just finger tightened the nuts at this point because the next step was to install the battery plate and the four landing skids and you need some vertical play between the frames to insert the skids. This took a little bit of effort as you have to insert the landing skids into the frames at the same time you interlock the skids into the battery plate. Once the skids and frames are lined up and installed correctly you can add loctite and tighten the four screws that hold the frames together. The four aluminum motor arms securely mount inside the frame with two m3x20 bolts and m3 nyloc nuts. This step is what really gives the airframe its rigidity. The last step before we move onto the electronics portion of the build is installing the four rubber grommets into the frame holes where all of the electronic wires will pass through. This completes the Invertix 400 airframe build.
Frame parts
Frame support brackets
Power distribution board
Skids and battery tray installed
Four motor arms installed
ELECTRONICS INSTALLATION
The first step in the electronics portion is mounting the NanoWii control board onto the plastic mounting posts and securing the board with four m3 plastic nuts and a drop of CA to insure the nuts won’t come loose over time. Don’t forget to install the four rubber o-rings onto the hex posts before installing the NanoWii which will help with any unwanted vibrations. The four Outlaw 2212-1400kv motors mount onto the arms with two m3x14 bolts and washers. I mounted the motors with all my wires facing in a clockwise direction and also applied loctite for addedsafety. Before I mounted the BEC and four ESCs I installed the eight zip ties through the pre-drilled frame holes. The Outlaw 2.5 Amp 5V BEC mounts up under the top frame and plugs into the power distribution board and the signal wire runs through the frame grommet, and then plugs into the far right port on the NanoWii. The four Outlaw reverse3D 25Amp Opto ESCs install onto the top frame and get secured down with the zip ties. All four sets of power wires from the ESCs run through the grommetsand plug into the power distribution board on the lower frame plate as well as connecting the wires to the four motors. Use the supplied zip ties to secure the motor and ESC wires under each frame arm. The next step is extremely crucial to a successful first flight. Please read the manual very close and carefully trace back each ESC signal wire one at a time and plug the appropriate ESC signal wire into the correct slot on the NanoWii controller,negative black wire down. The extra yellow signal wires do not plug into anything as they are there for any possible future updates Encore RC may release. Once you have checked and rechecked all ESC wires are plugged into the correct ports on the flight controller, you can install the flight controller cover plate with four m3x6 bolts using loctite. The last step in the electronics build is to install either your pre-bound Spektrum receiver or an external receiver onto the mounting platform and plug it into the NanoWii. This completes the electronics portion of the Invertix 400 build and we are ready to move onto setup.
NanoWii installed
Outlaw 2212-1400kv motors
Motors bolted up
BEC and zipped ties installed awaiting the four Outlaw ESCs
ESCs secured
*VERY IMPORTANT STEP* Make sure all ESC wires correspond to appropriate locations on the NanoWii
SETUP
The brain behind the Invertix 400 is the NanoWii flight controller which comes preprogrammed for either a Spektrum satellite or external receiver. For my build I used a Futaba 14SG and an external 7 channel receiver, though just a 5 channel receiver is needed. I created a new helicopter model and selected H-1 for the swash plate setting. I assigned my channel 5 to auxiliary 1 which is activated by my idle up switch. Make sure you follow themanual and reverse the appropriate channels stated in the manual for the radio brand you are using. The NanoWii flight controller works like a traditional airplane receiver setup so you can use the digital transmitter trims to trim out the model. The NanoWii needs to see channel 5auxiliary set to full negative and positive end points to activate the system. Use the default 100% end points for aileron, elevator and rudder channels for a beginner setup. You can increase the end points later for faster flip, roll and piro rates if desired. Throttle end points should be set to 125% to start off with as the end points of the throttle channel control the overall power of the model. To make sure appropriate motors were spinning in the correct direction I added a piece of tape onto each motor shaft and quickly powered up the Invertix 400 and watched the direction the motors spun. Two of my motors had to be reversed which was done by swapping two of the three motor wires. To power up the motors on the Invertix 400 you have to flip into flight mode. I use my idle up switch to activate the NanoWii controller. Normal mode and idle up 1 mode do not do anything and act as throttle hold. The Invertix will not activate until you flip into idle up 2. You want to make sure your throttle stick is at mid stickaround 55-60% while the motors start their slow start process. The Outlaw ESCs are preprogrammed with a soft start feature but if you have the throttle stick above or below half stick after the slow start finishes the modelwill follow that command and accelerate pretty quickly. Once you are done flying the model just land and flip out of the idle 2 and the motors will shut off and disarm the system.
External receiver bond and hooked up
IN THE AIR
The Invertix has the look of a flying frog floating through the air with its long aluminum arms and 8" propellers. It hovers very smooth and stable. I was amazed how fast the ESCs were capable of reversing the direction of the brushless motors in flight. Encore RC has programmed the ESCs and motors for extremely quick direction changes with continued reliability flight after flight. It did not take me long to get used to how the Invertix flies however I recommend putting a few battery packs through the machine before attempting 3D maneuvers. I am a pretty competent 3D pilot yet flipping and rolling the Invertix for the first few times was a lot different than standard 3D helicopters. I bounced the Invertix off the ground pretty hard my first flip and broke one prop and a few landing skids. The obvious advantage of the fixed pitch propeller approach is simplicity but these results in the collective feeling almost squishy. You will want to be one step ahead on the collective during 3D maneuvers. The ESCs operate very fast but there is still some latency as the motors change rpm or direction in response to control inputs. I’ve got to tell you though once you’ve mastered how the Invertix flies its list of maneuvers in long. Nothing is cooler than hearing the motors stop and reverse as the Invertix piro flips across the sky.
Flight times averaged around 3-4 minutes depending on your flying style and lipos you choose to use. I fly my Invertix with Pulse Ultra 2250mAh 45c lipos. I set my timer to three minutes which usually brings my flight packs down with 35% battery life remaining after hard 3D flights. If I'm just sport flying I could get around a four minute flight. The manual states the Invertix can accommodate up to a 2700mAh pack which would further your average flight time.
Final Touches
The Invertix 400 kits come with a pre-painted high visibility canopy that provides unparalleled visibility and orientation during all flying maneuvers. Each canopy comes with a set of quality vinyl decals and four canopy nut and bolts. Once you install the canopy you really don’t need to get back to the electronics again. Encore RC also offer LED lighting strips sold separately that come pre-wired and plug directly into a port on the Outlaw ESCs. This is a fun and colorful add-on if you plan to night fly.
PRO TIPS
- Sand down any edges on the carbon fiber frame where electronics wires may contact
- Double check blade and motor direction before first initial test flight
- Move the throttle stick set to half stick on spool up
THE LAST WORD
The Invertix 400 is the ultimate machine to practice and enjoy 3D flying without having to worry about costly crash mistakes. It has an ultra low parts count making it simple and affordable to repair with the average crash costing around $20-$30. With its incredibly robust and simple design even a beginner can get it flying in hours.Bobby's team has focused much of their time on the R&D to perfect the Outlaw reverse3D ESCs and motors. I was impressed from the second I put it into its first hover inmy front yard at how stable it was having no built-in stability features. I really enjoy flying the Invertix around my yard and turning heads at the local flying fields. I would highly recommend it to anybody looking to make the transition from a coaxial helicopter to something more maneuverable with the flight characteristics of a collective pitch 3D helicopter. It is very fast andresponsive when you want it, but can be dialed down by just decreasing your end points for a great docile 3D trainer. You could even mount a Mobius action camera on the bottom for some cool aerial video. Encore RC has also released an update card to reprogram the four stock ESCs to allow 4s packs. You can still fly it on 3s or 4s packs after the update. The Invertix 400 truly is the next step in affordable 3D quad-copters. Enjoy and see you at the field.
CONTACT
ENCORERC, encorerc.com, support@encorerc.com
Videos:
Build
6 Invertix Demo
Invertix pylon race
 ? seems like a decent deal for 749. !!!!!